Create an RCS agent
Want to send messages with images, buttons, carousels and more - directly to the recipient's messaging app? Then RCS (Rich Communication Services) is your solution. In order to send RCS messages, you must first create an RCS agent. The agent acts as your company's verified sender.
In this guide you will learn step by step how to create an RCS agent in inMobile.
N.B.
This feature is not yet open to all users in inMobile. Contact us at support@inmobile.com if you want to get access to RCS.
How to create an RCS agent
-
Go to RCS agents in your account
Log in to your inMobile account and go to "Settings" in the bottom left corner. Then click on "RCS agents". -
Create new agent
Click on "Create new agent". -
Fill in information
Fill in all the fields and click "Next".
Agent name: The name that appears as the sender at the recipient.
Billing category: Choose whether to bill per message or per session. The choice depends on what you need the agent for.
Examples of use: Select what you want to use the agent for.
N.B.
You can create as many agents as you need. An agent cannot be changed once it has been created. In addition, each agent can only be used for one purpose, such as one-time codes or promotion (RCS marketing). -
Add information to your agent
Fill in the information that recipients should be able to see on your RCS agent. Including a description of your company, contact details, logo etc. Then click "Next". -
Enter the contact person for the agent
Fill in the contact details of the employee responsible for the RCS agent. Click on "Next".
You will now be directed back to the overview of your RCS agents, where your agent will be stored as a draft. -
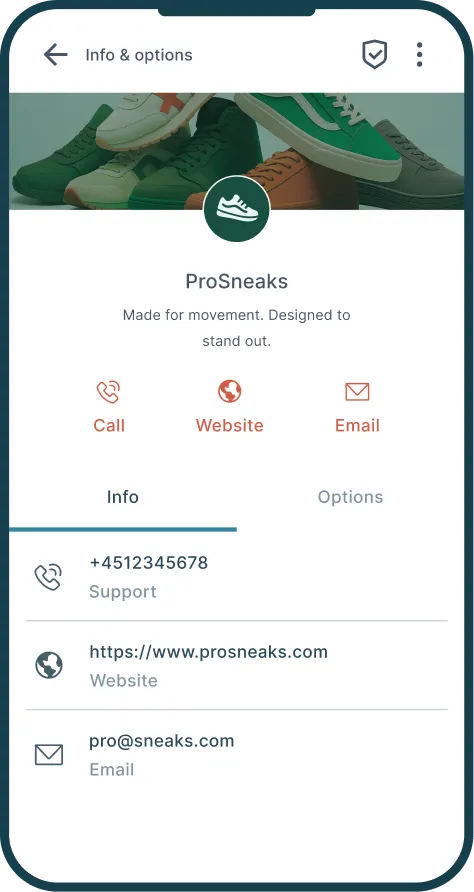
Browse your agent
Click on the agent in the overview. Here you can see a preview of what your agent looks like with the information you have entered. -
Test your agent
At the top of the page you will find the "Devices" tab. Here you can enter a phone number to test your RCS agent. Remember that your phone must be RCS compatible. -
Launch the agent
When you are satisfied with the setup, click "Launch agent". -
Answer Google's verification questions
You will now be directed to a series of questions that Google uses to verify your RCS agent. Answer the questions and click "Next". -
Select which countries you want to send to
Select which countries this agent should be able to send RCS messages to. In the list you can see the countries where inMobile supports RCS. We recommend that you choose one country per agent. -
Send the agent for approval
Click on 'Launch'.
Your agent is now sent for approval to Google and the telecom operators in the countries where you want to use RCS. Approval time depends on the operators and can therefore vary.
N.B.
Under the "Operators" tab, you can see how many operators have approved your agent so far. All operators must have authorised the agent before you can start sending RCS messages from it.
RCS explained
RCS allows you to send more interactive and engaging messages than you can with traditional SMS. With RCS, you can use images, buttons, carousels, verified senders and more - and it's all still sent directly to the recipient's mobile messaging app.
Read much more about RCS in the article: What is RCS?