Email to/from SMS
Send and receive text messages via your email
Email to/from SMS allows you to send and receive text messages directly from your email without installing any software.
How to set up email to SMS
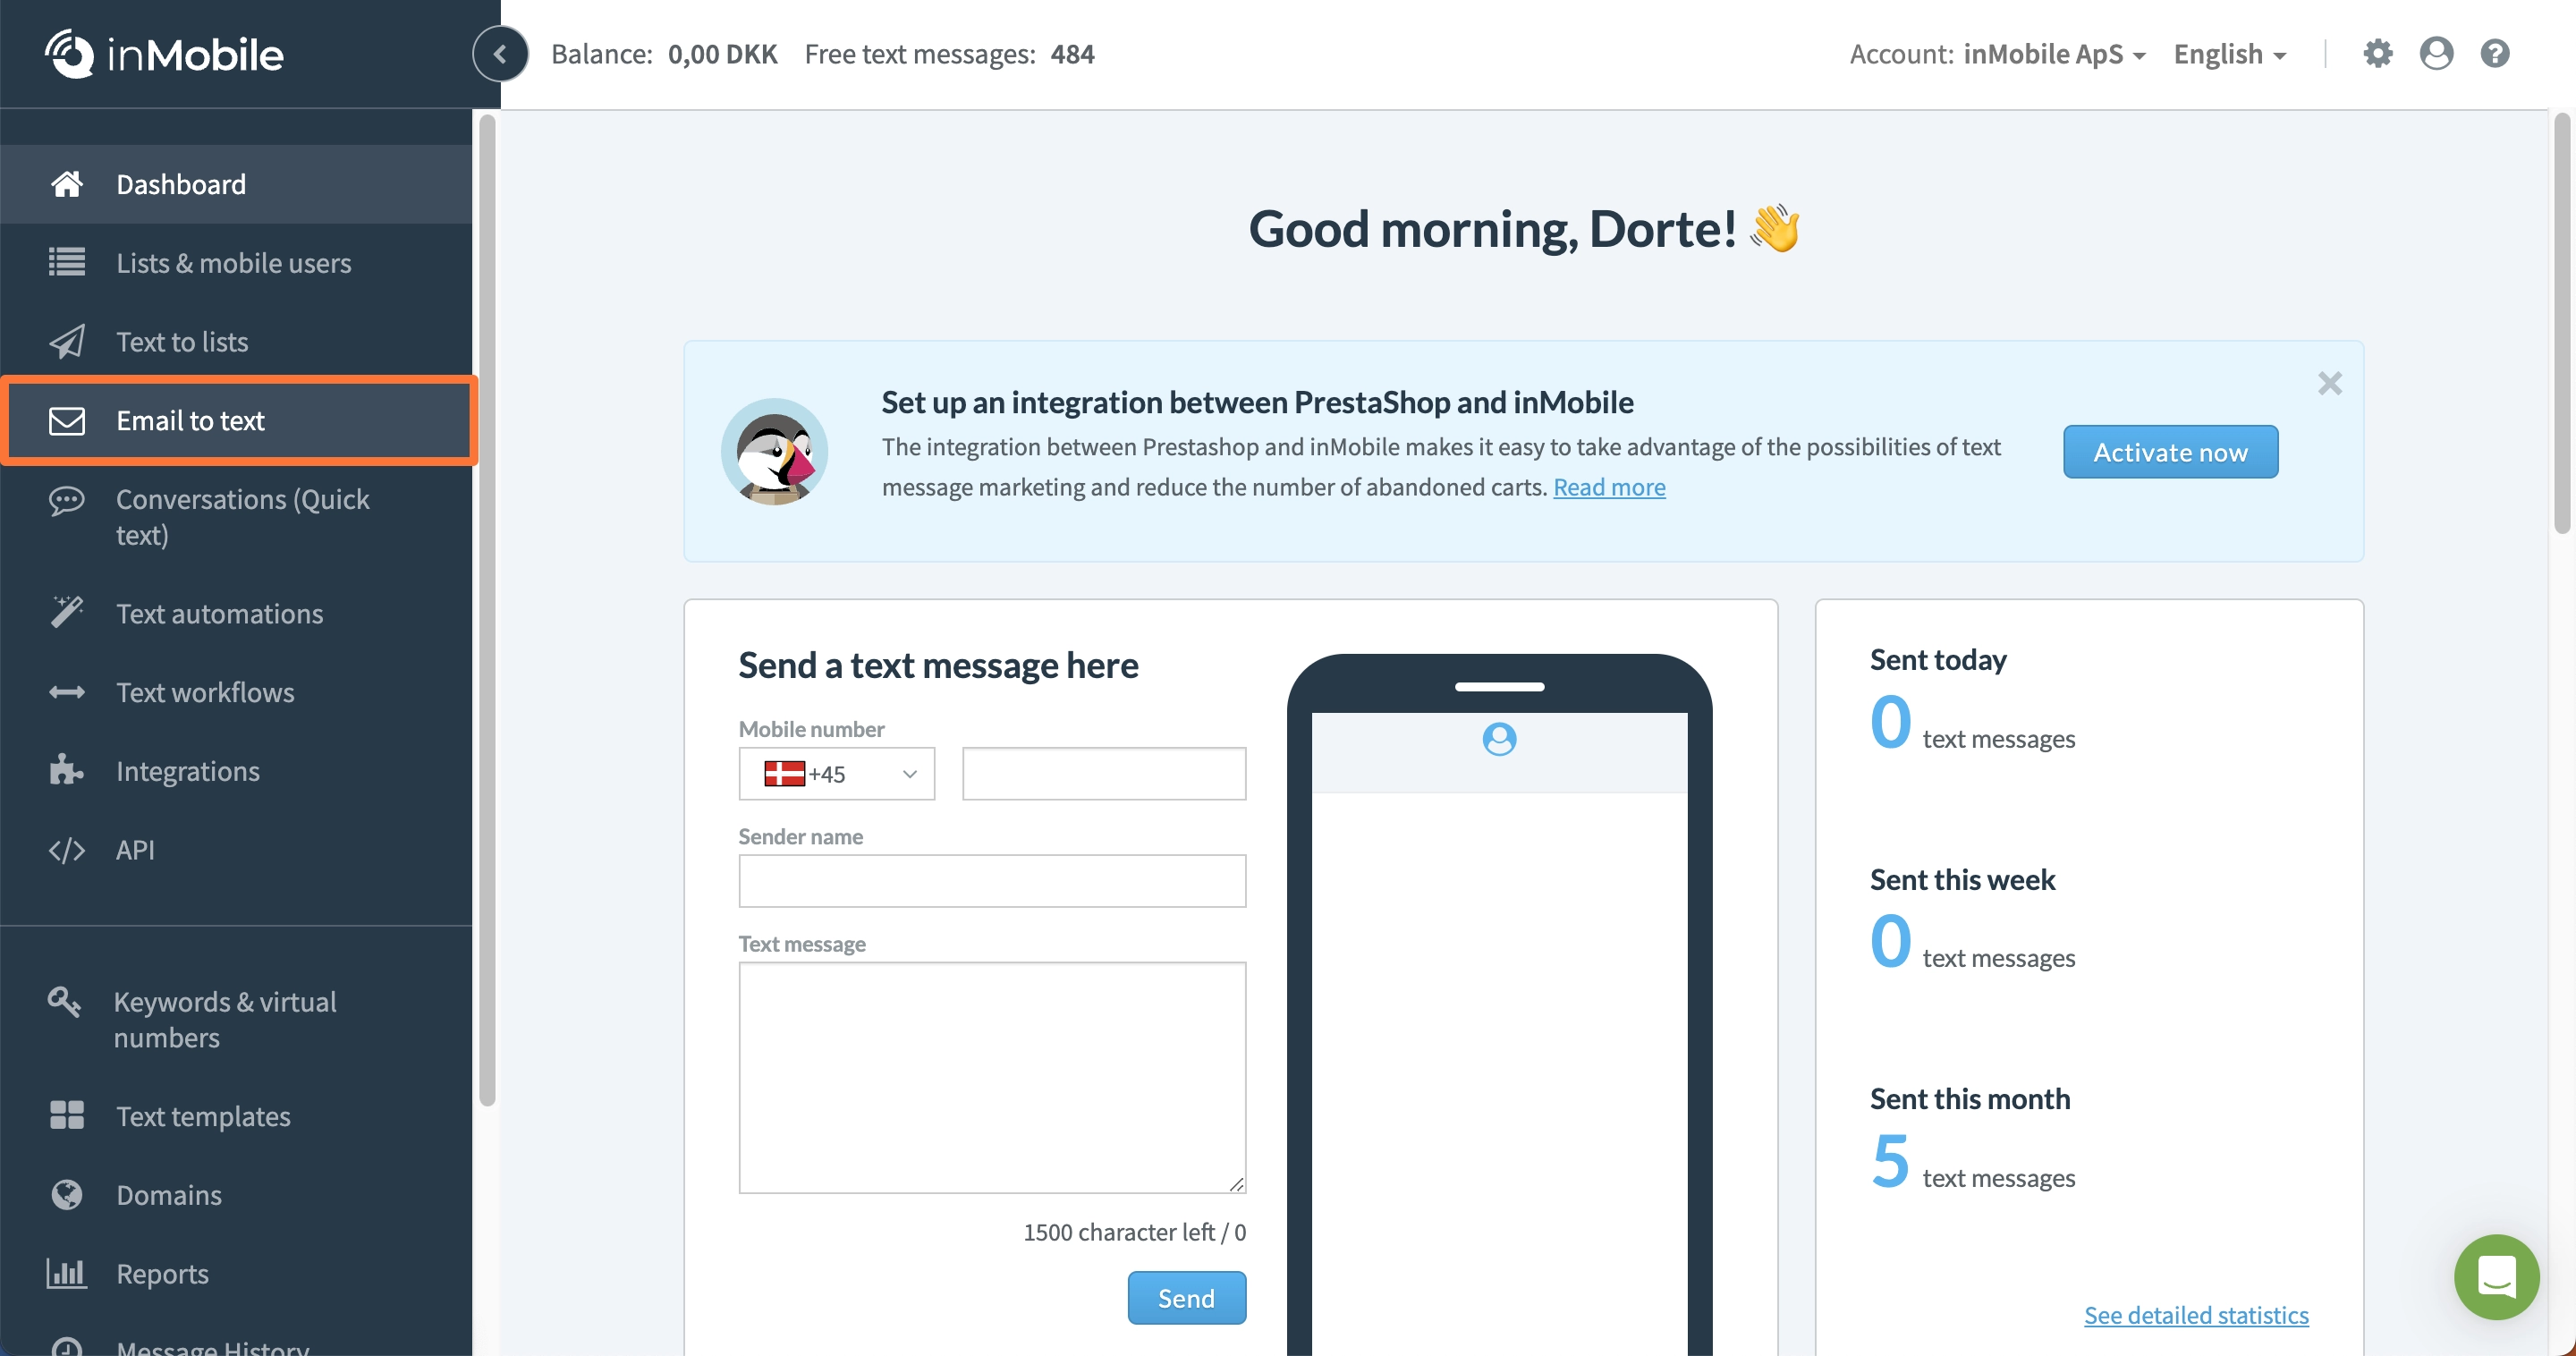
1 - Log in to your inMobile account and go to “Email to text”.
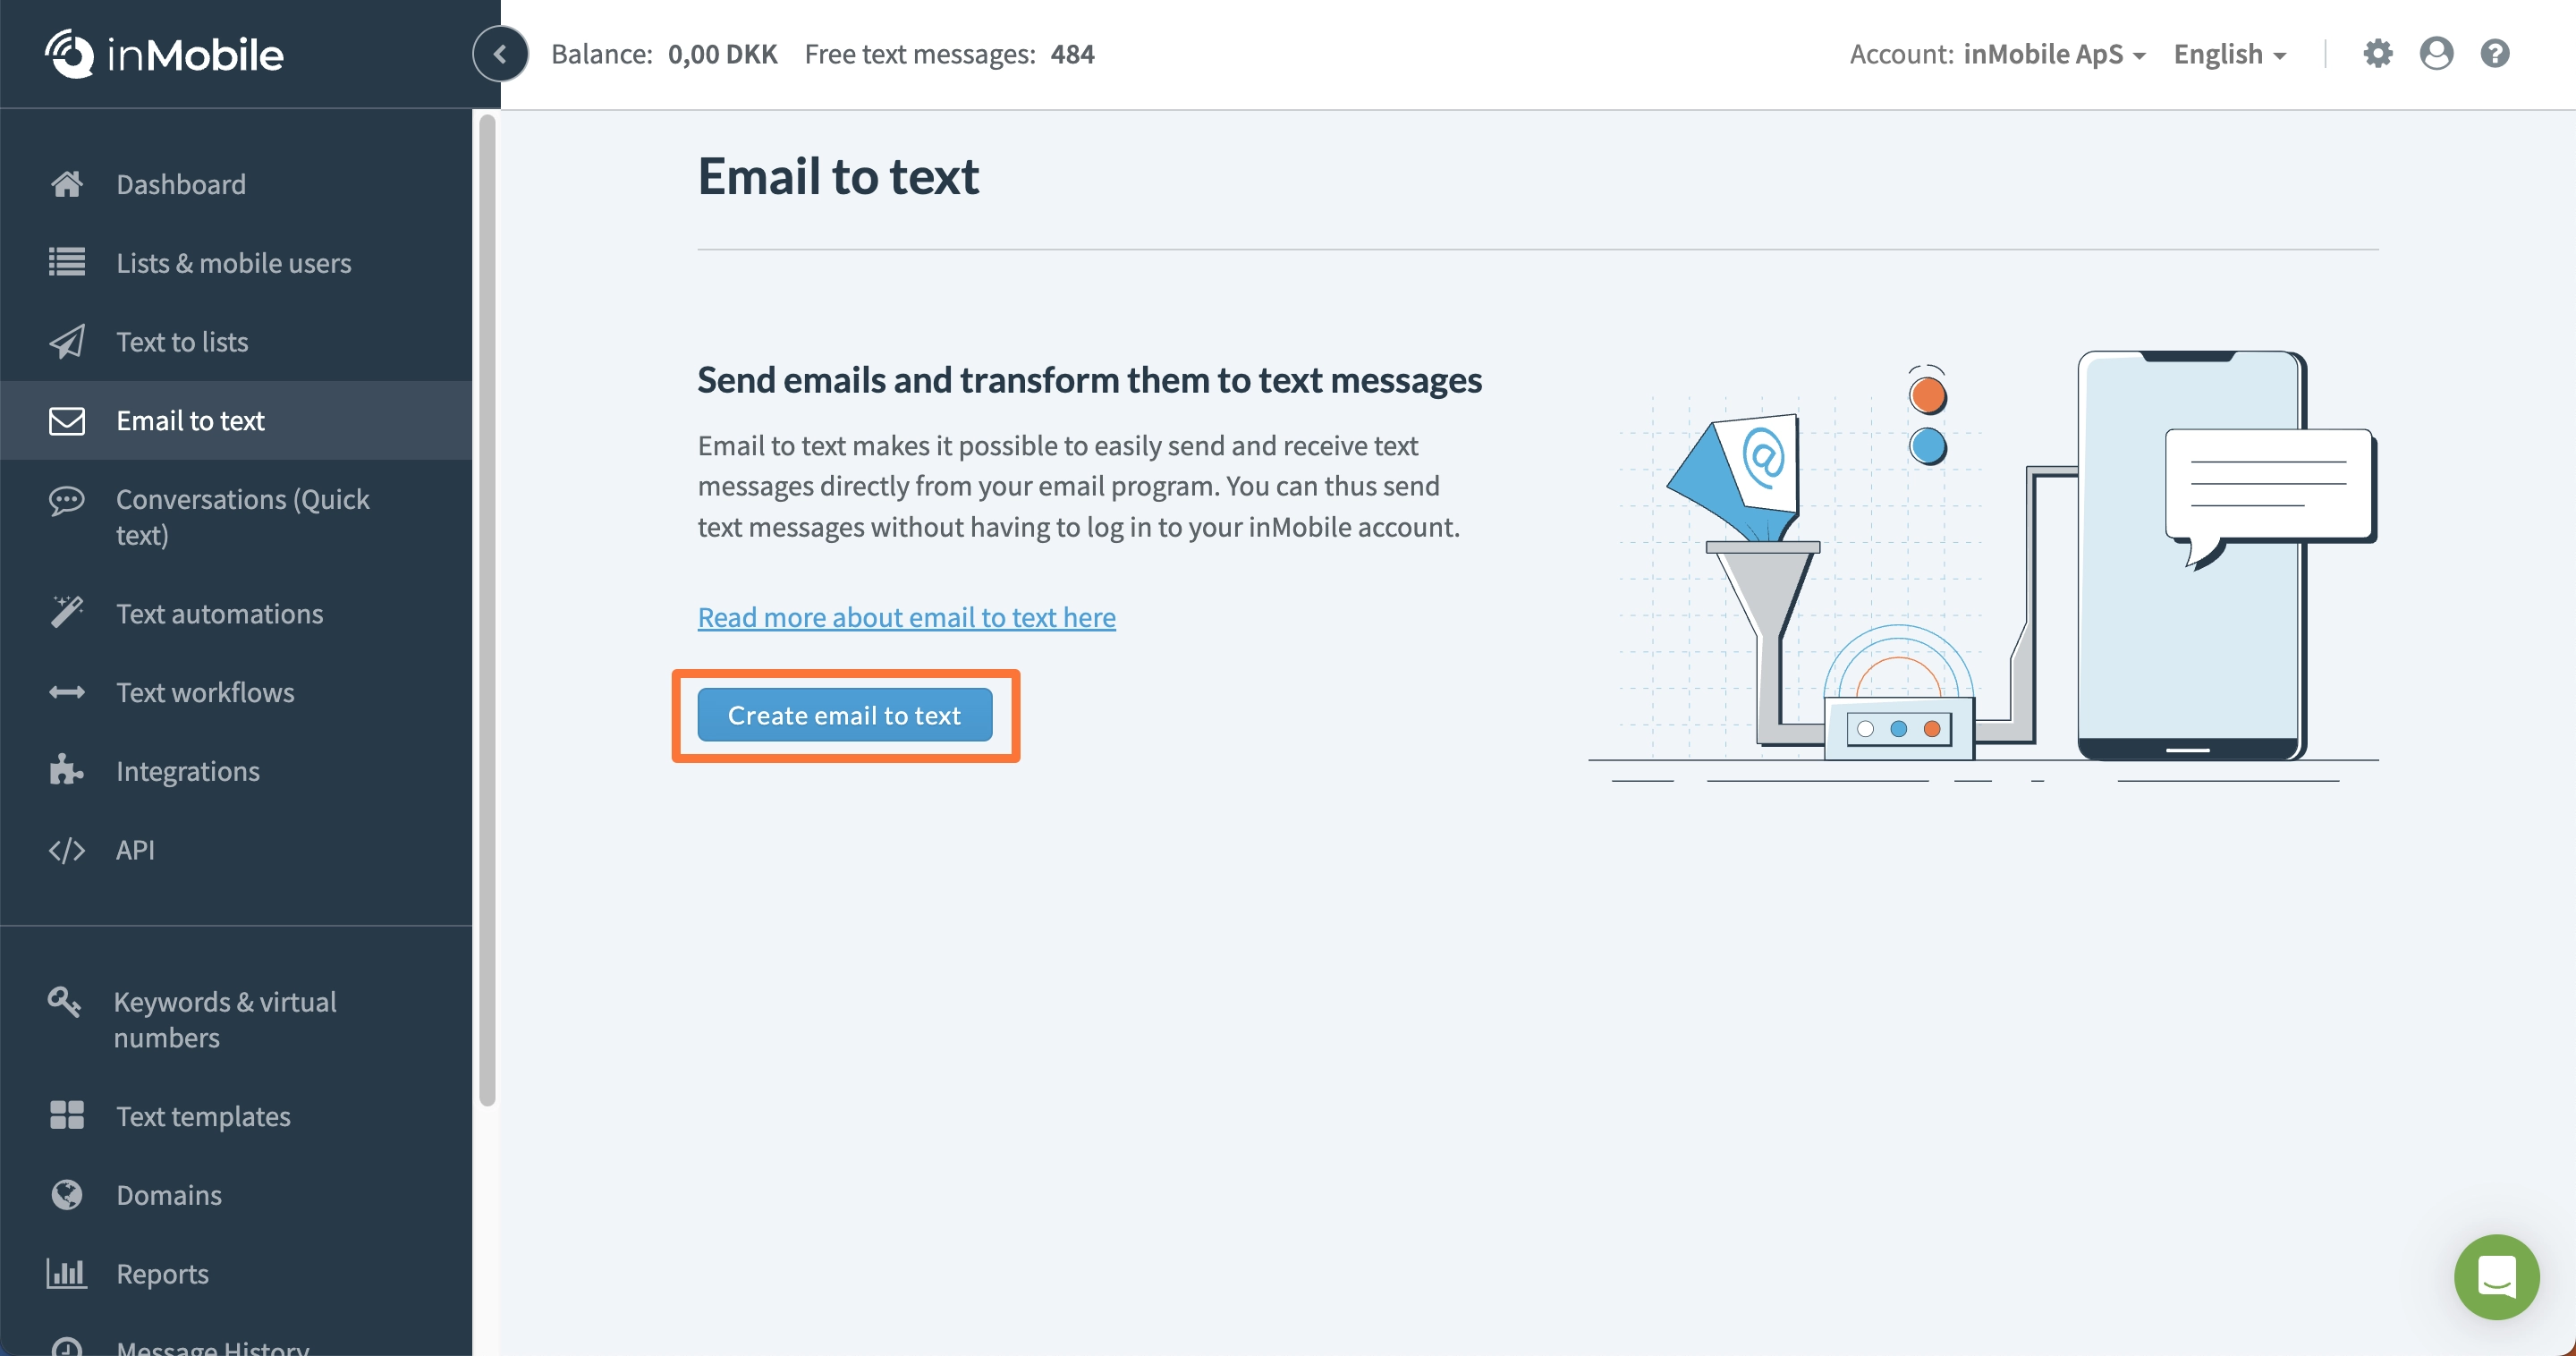
2 - Click "Create email to text".
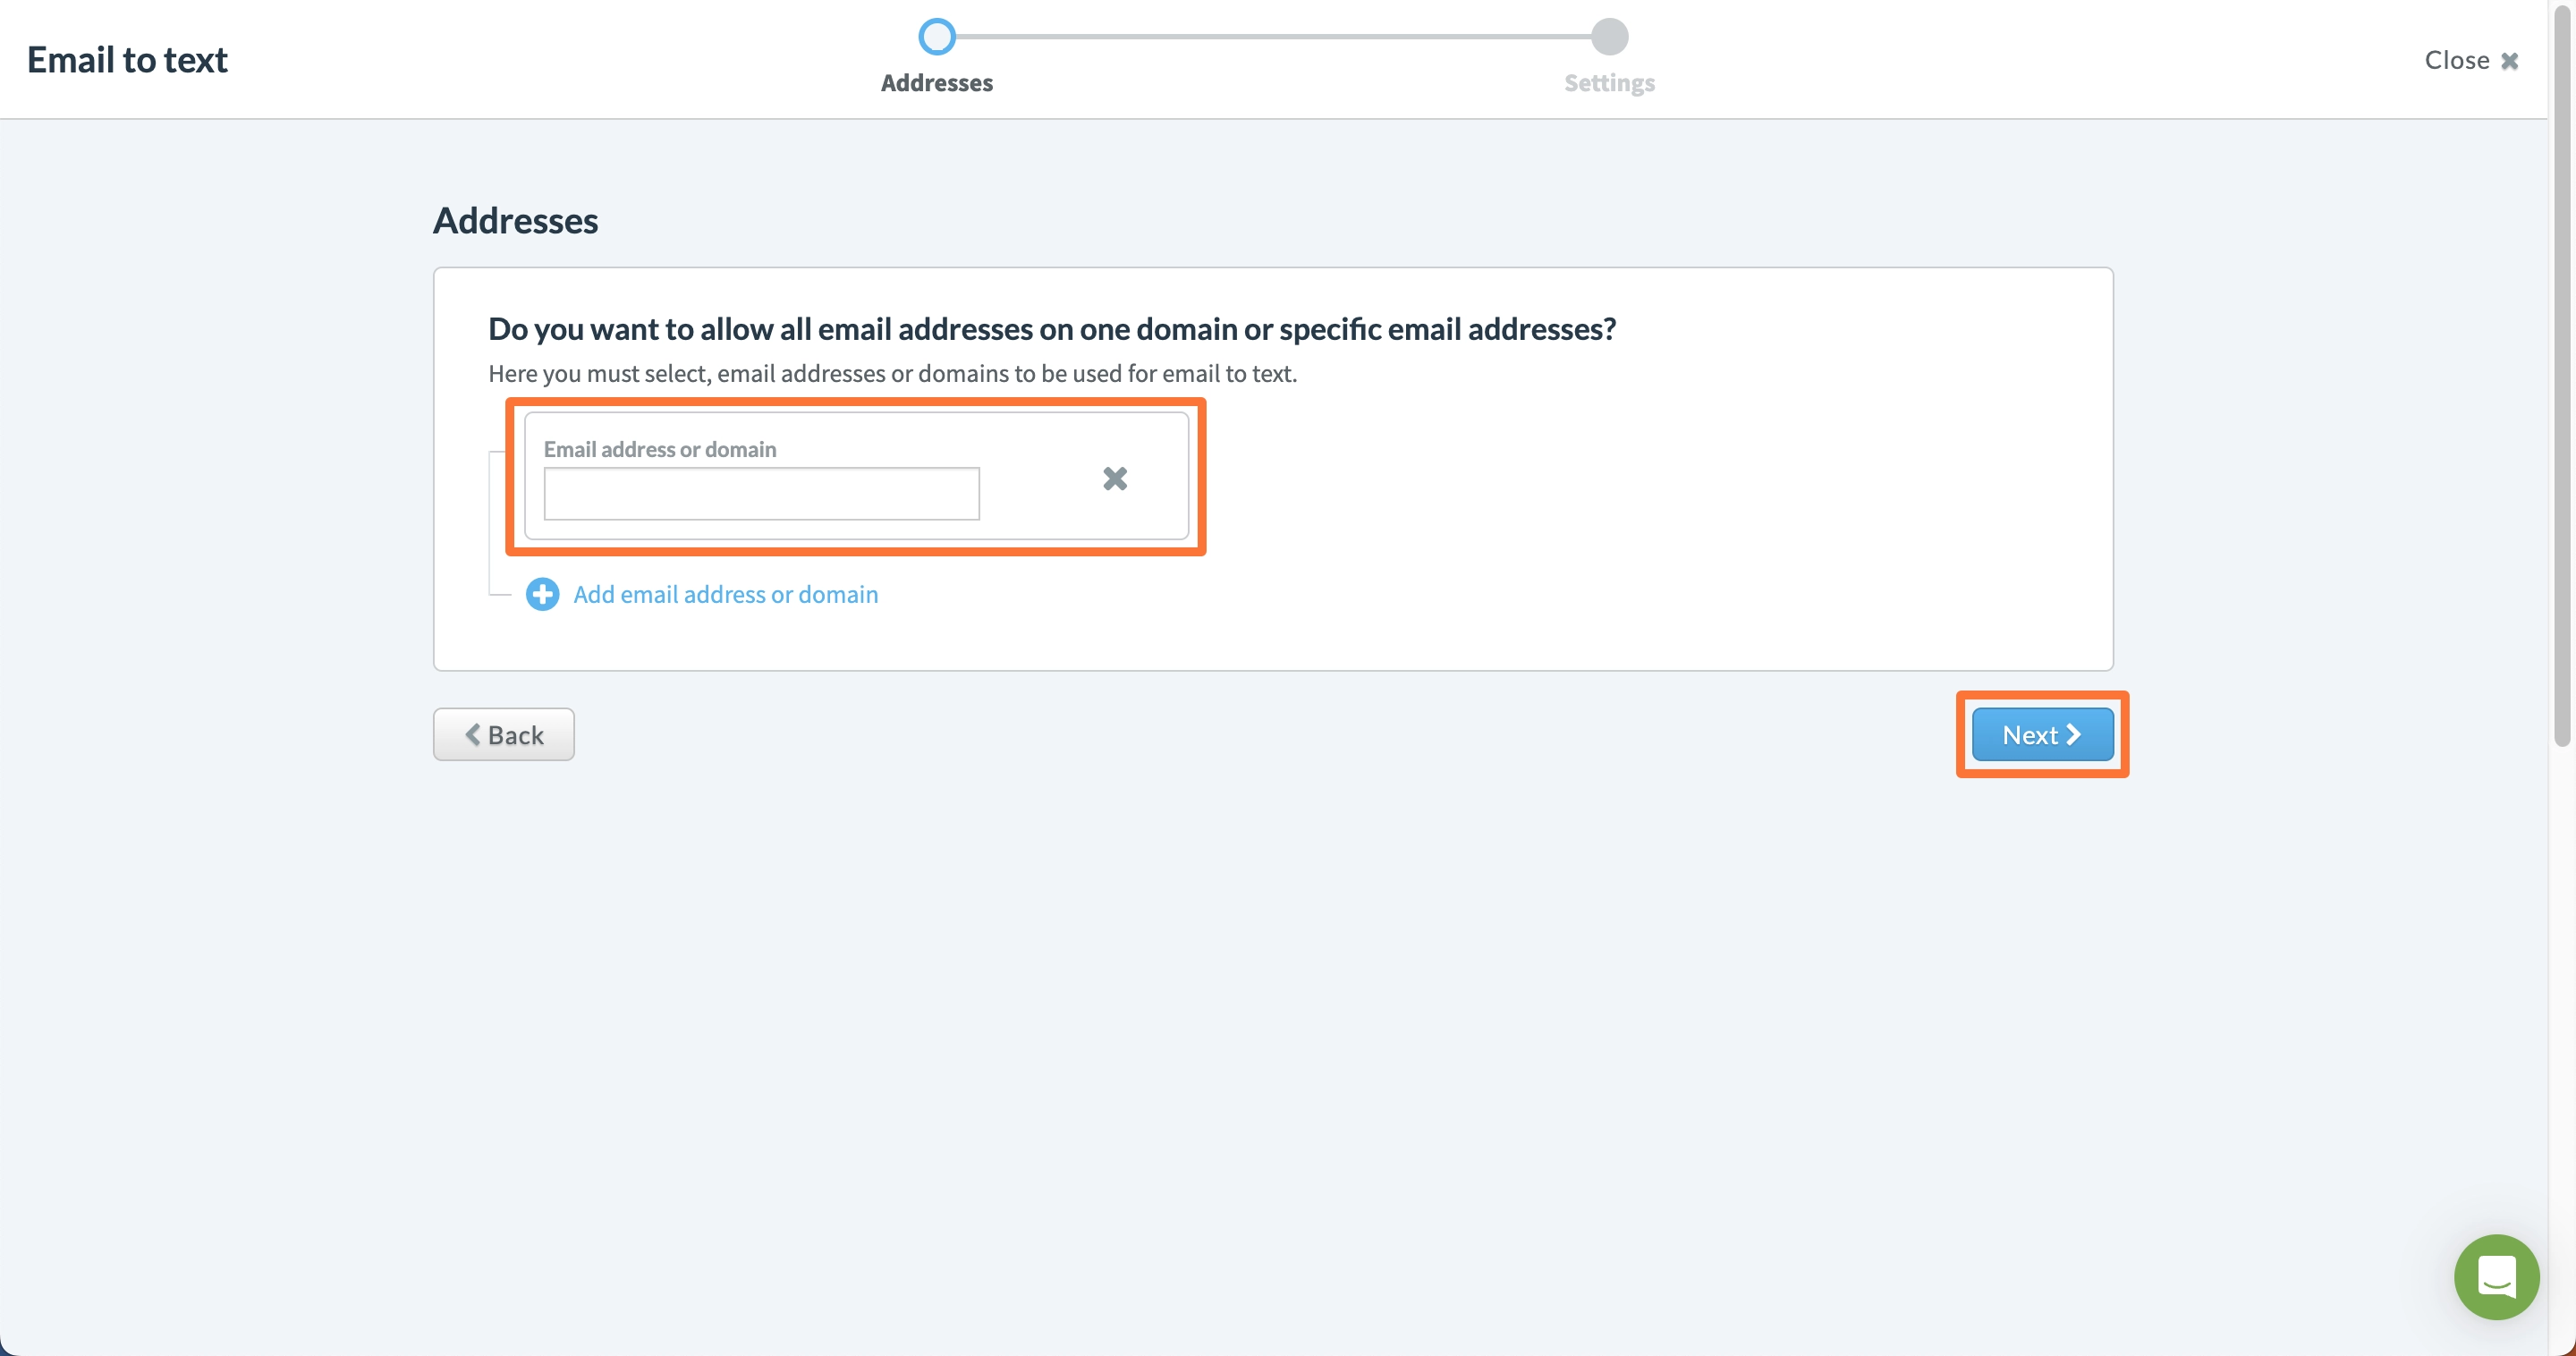
3 - Here you need to whitelist either a domain or a specific email address. If you whitelist a domain, start it with an @ sign. For example: “@inmobile.com”. Please note that a domain can only be whitelisted on one account at a time. Click “Next”.
4 - Enter a sender name. You can use a fixed sender name or use the content from the subject field of the sent email. The sender name will appear at the top of the text message on the mobile user’s phone. To use 2-way SMS, you need to use a virtual phone number as the sender name.
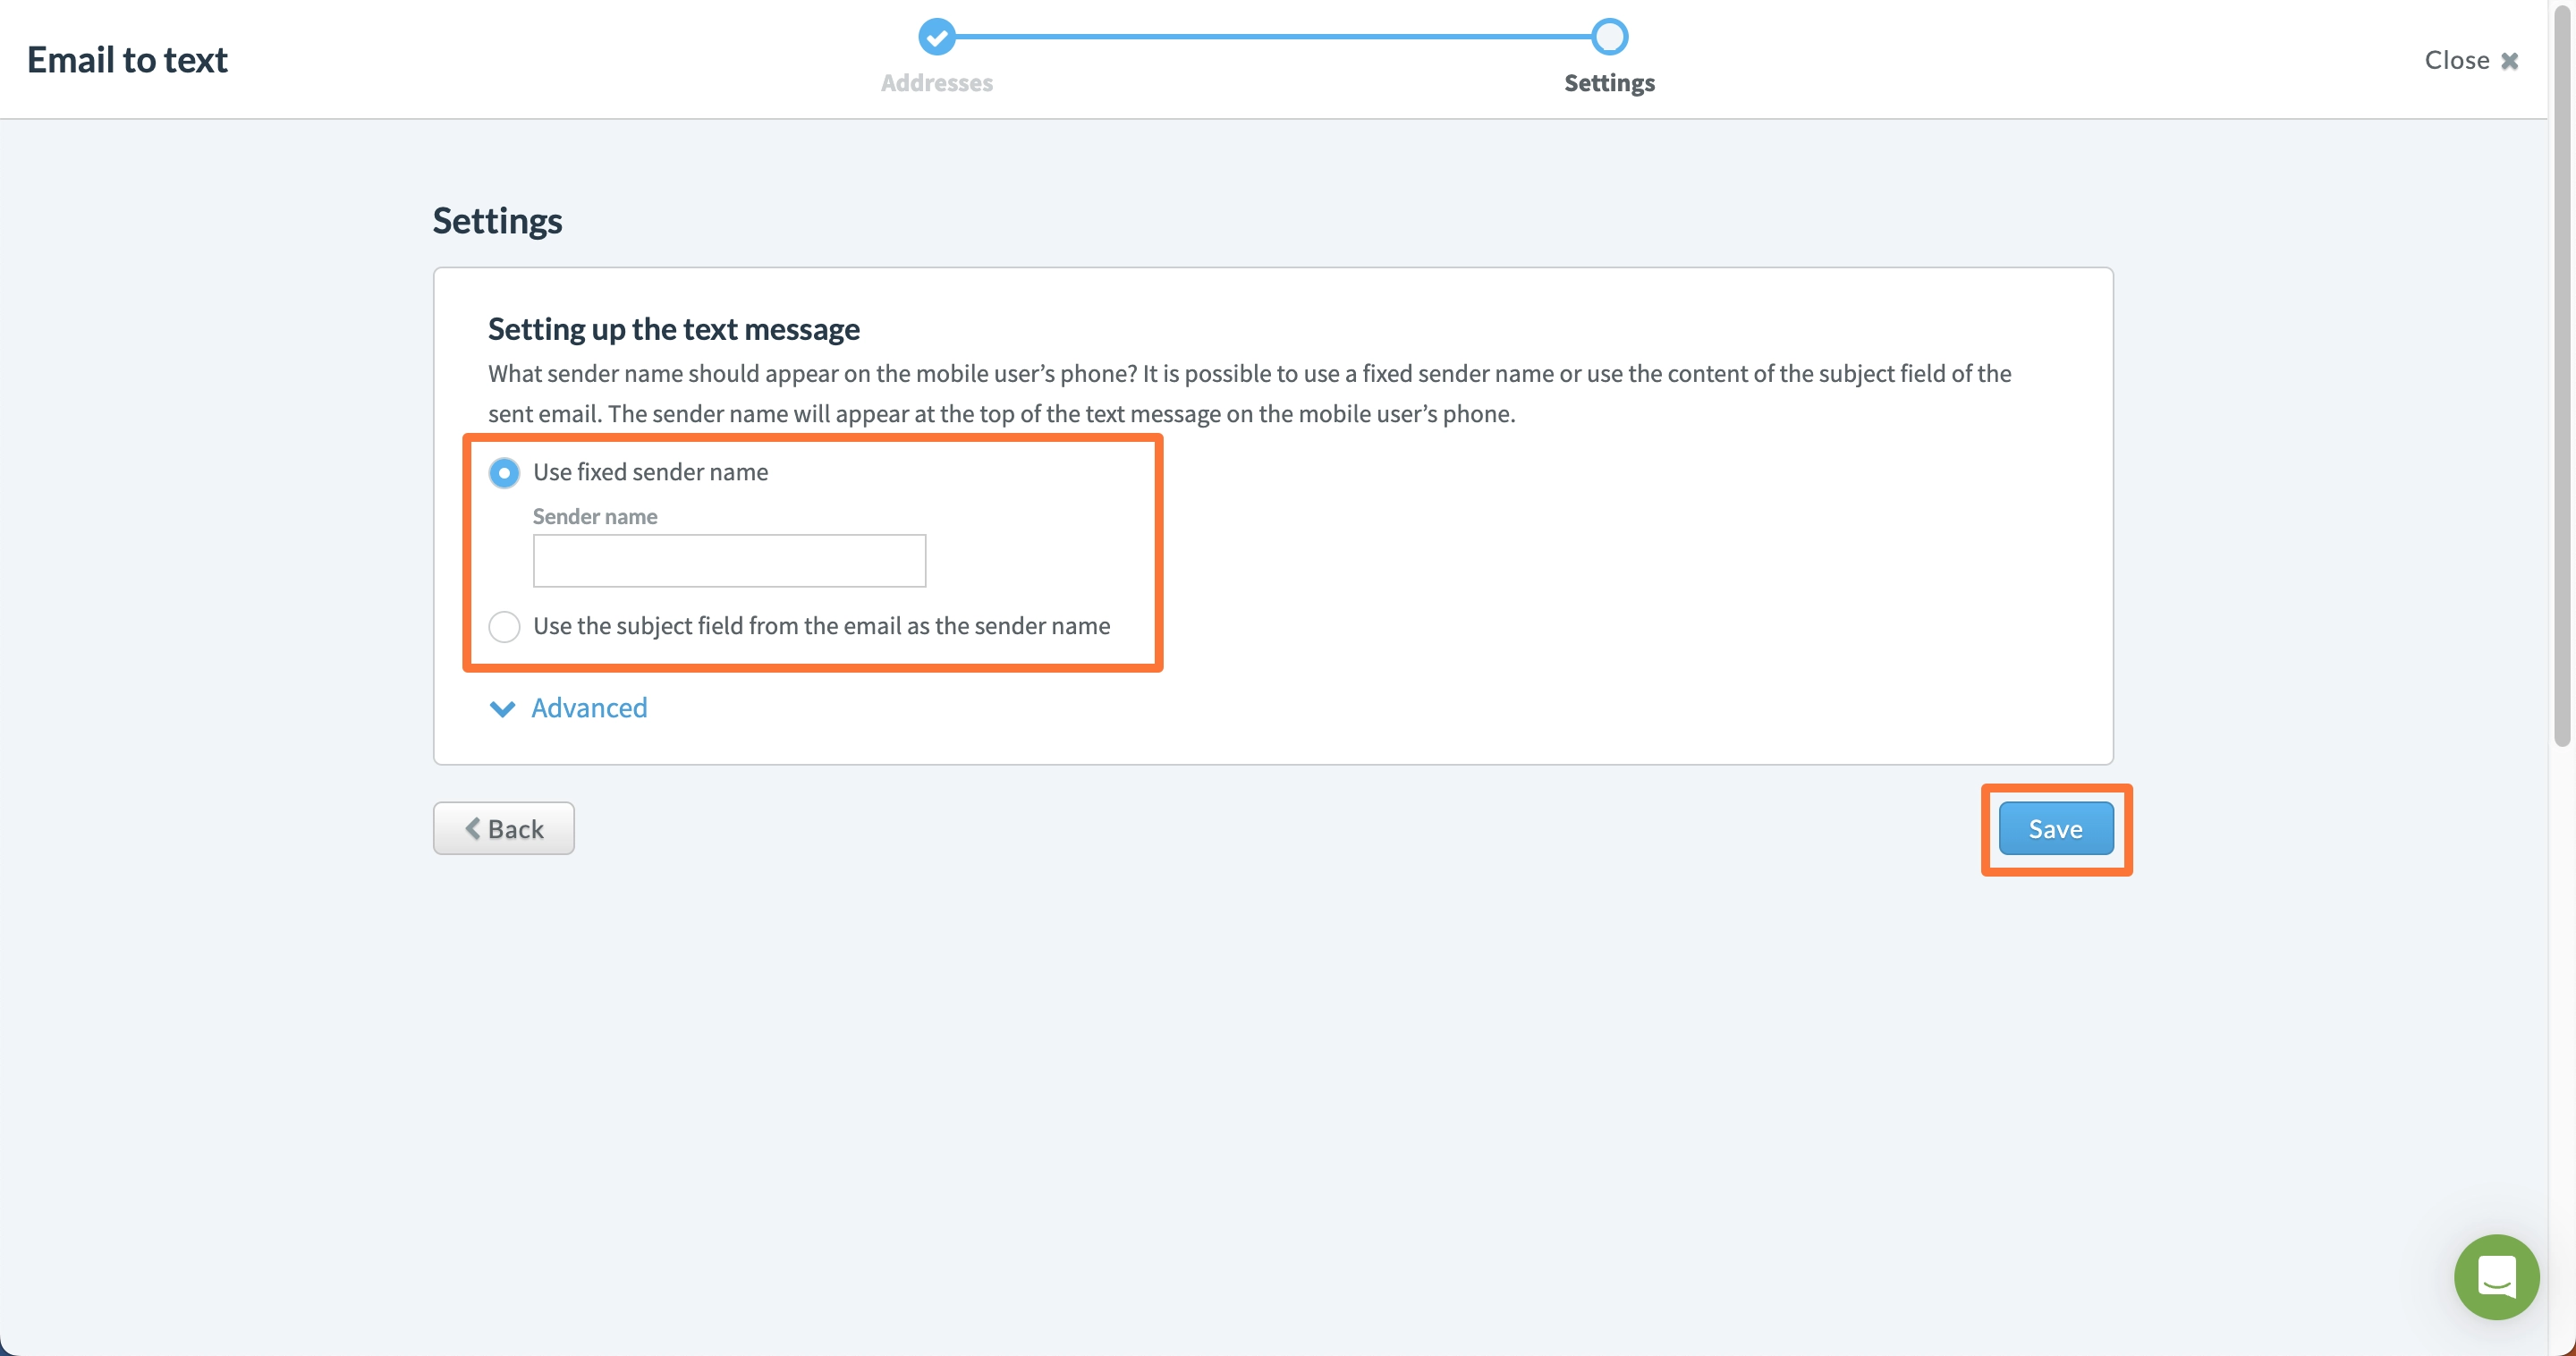
5 - Click "Advanced" to customise settings.
6 - After this is done, you can send an email to the following address: "MSISDN@sms.inmobile.dk", where "MSISDN" is the number of your recipient. An MSISDN consists of both a country code and a phone number. For example: if you want to send a message to the Danish number 12345678, send an email to "4512345678@sms.inmobile.dk".
How to set up SMS to email
1 - Log in to your inMobile account, navigate to "Text workflows".
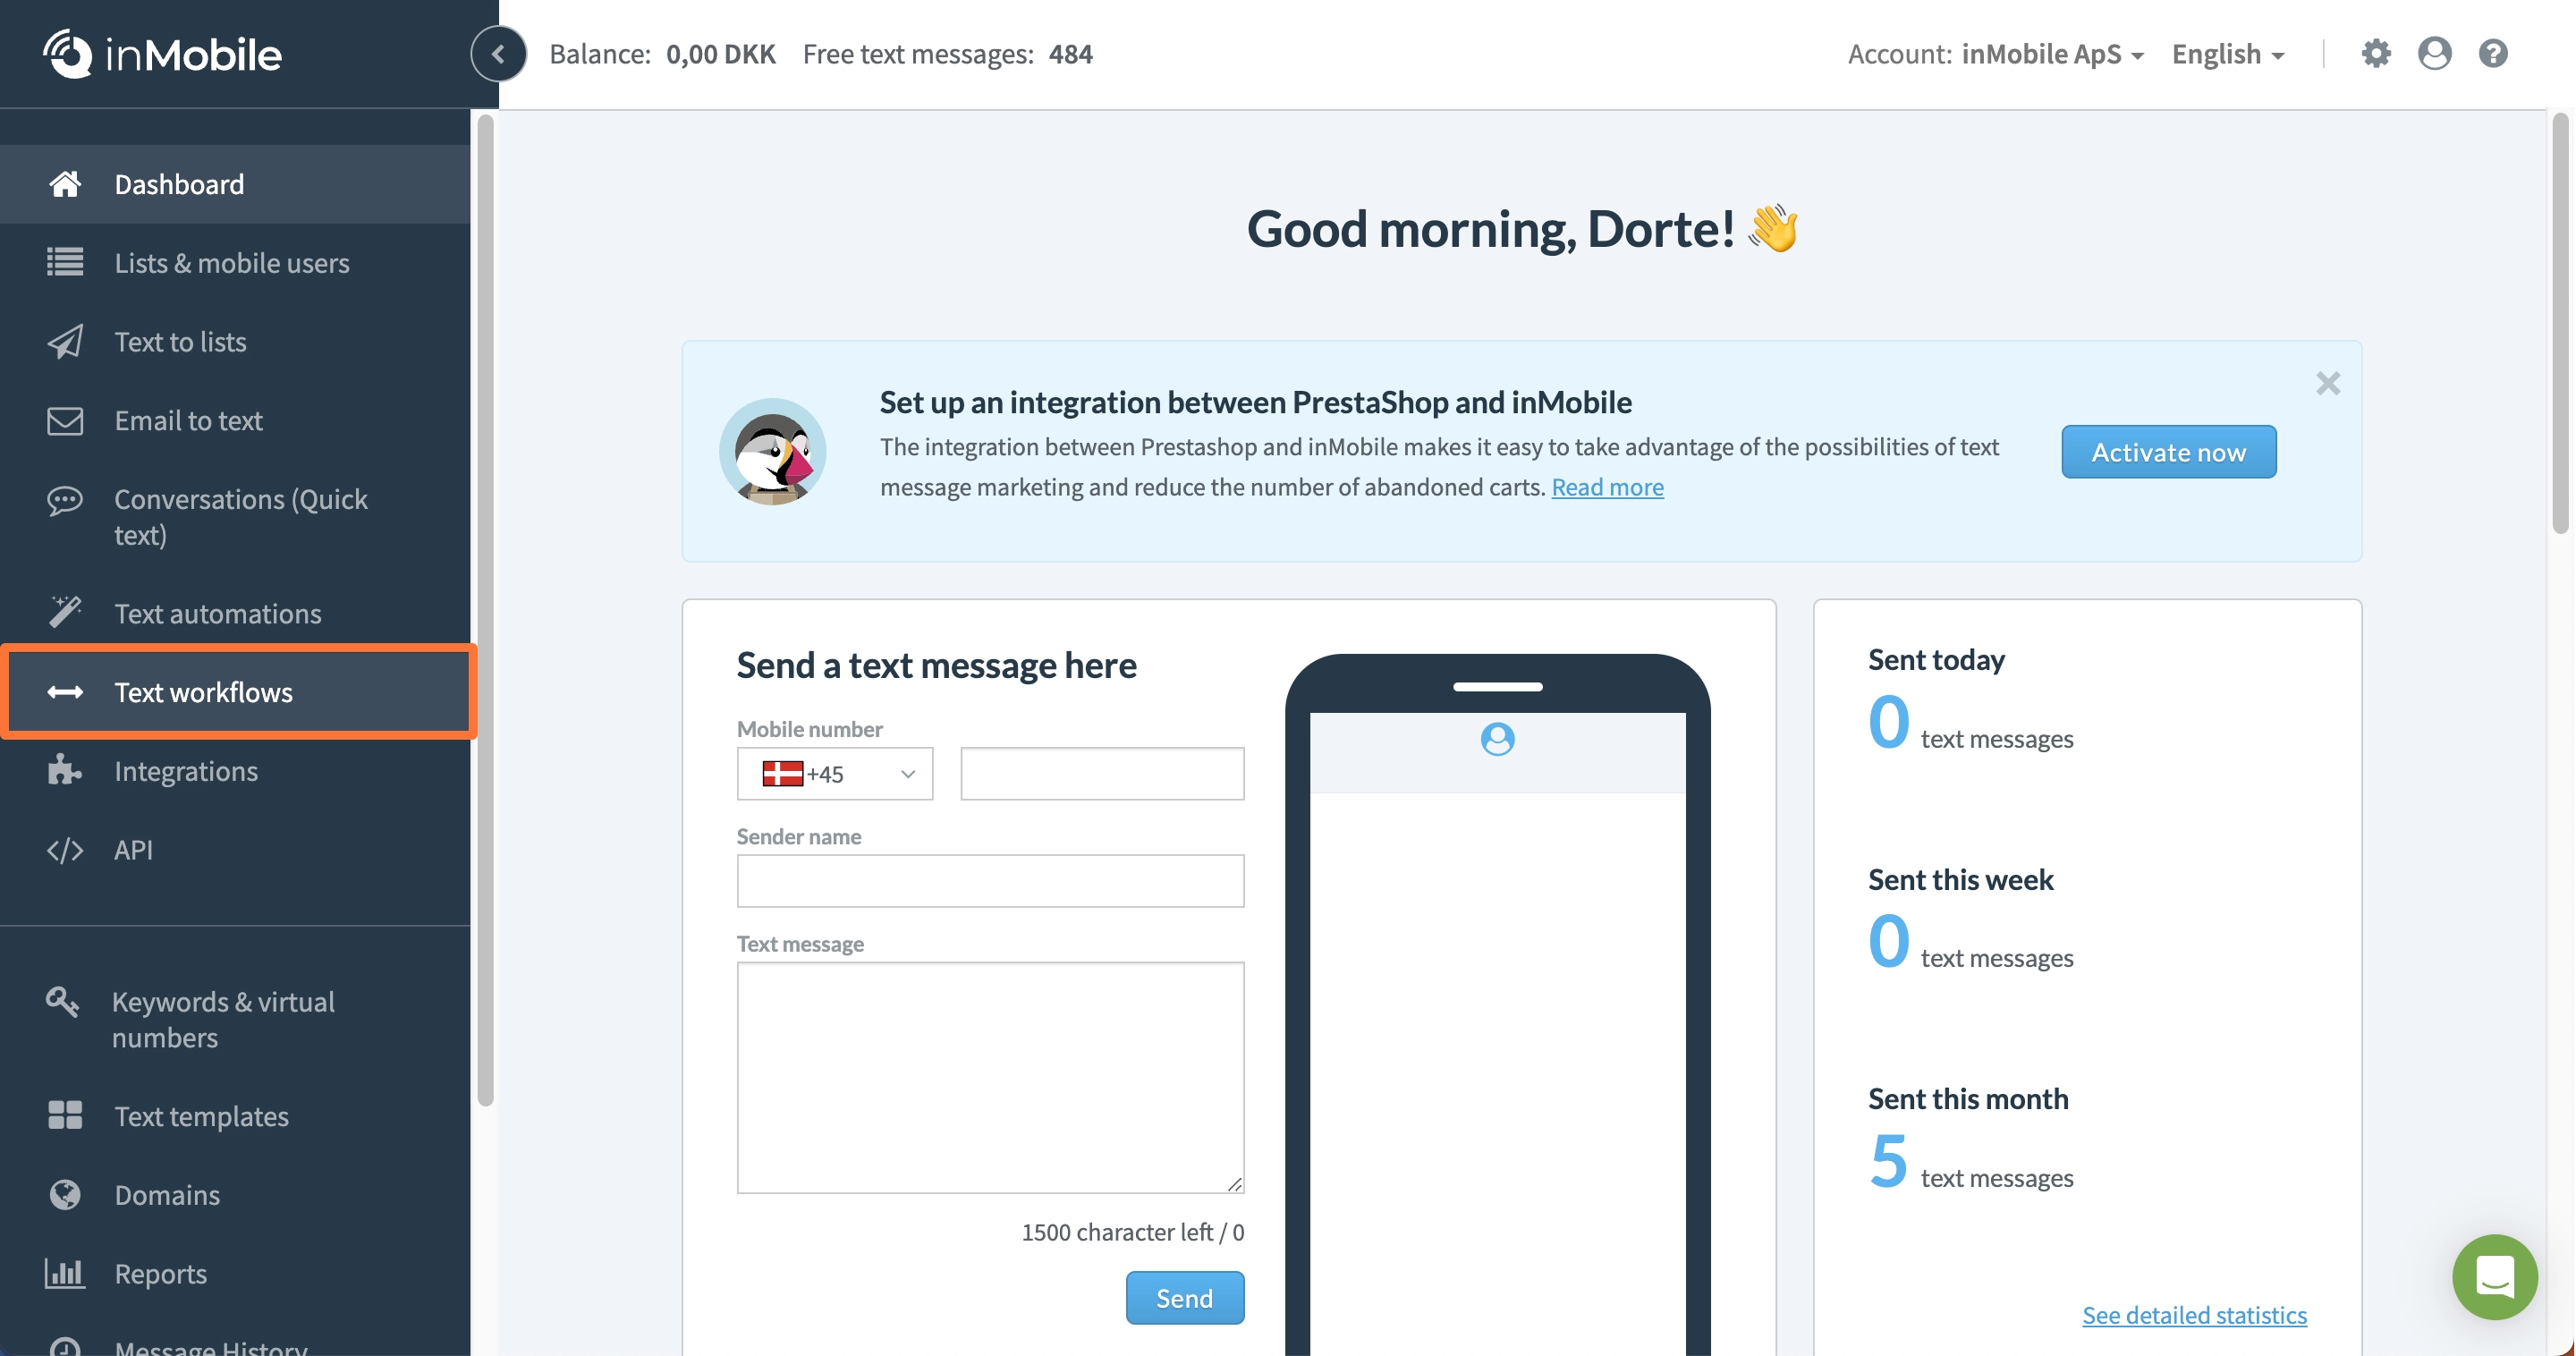
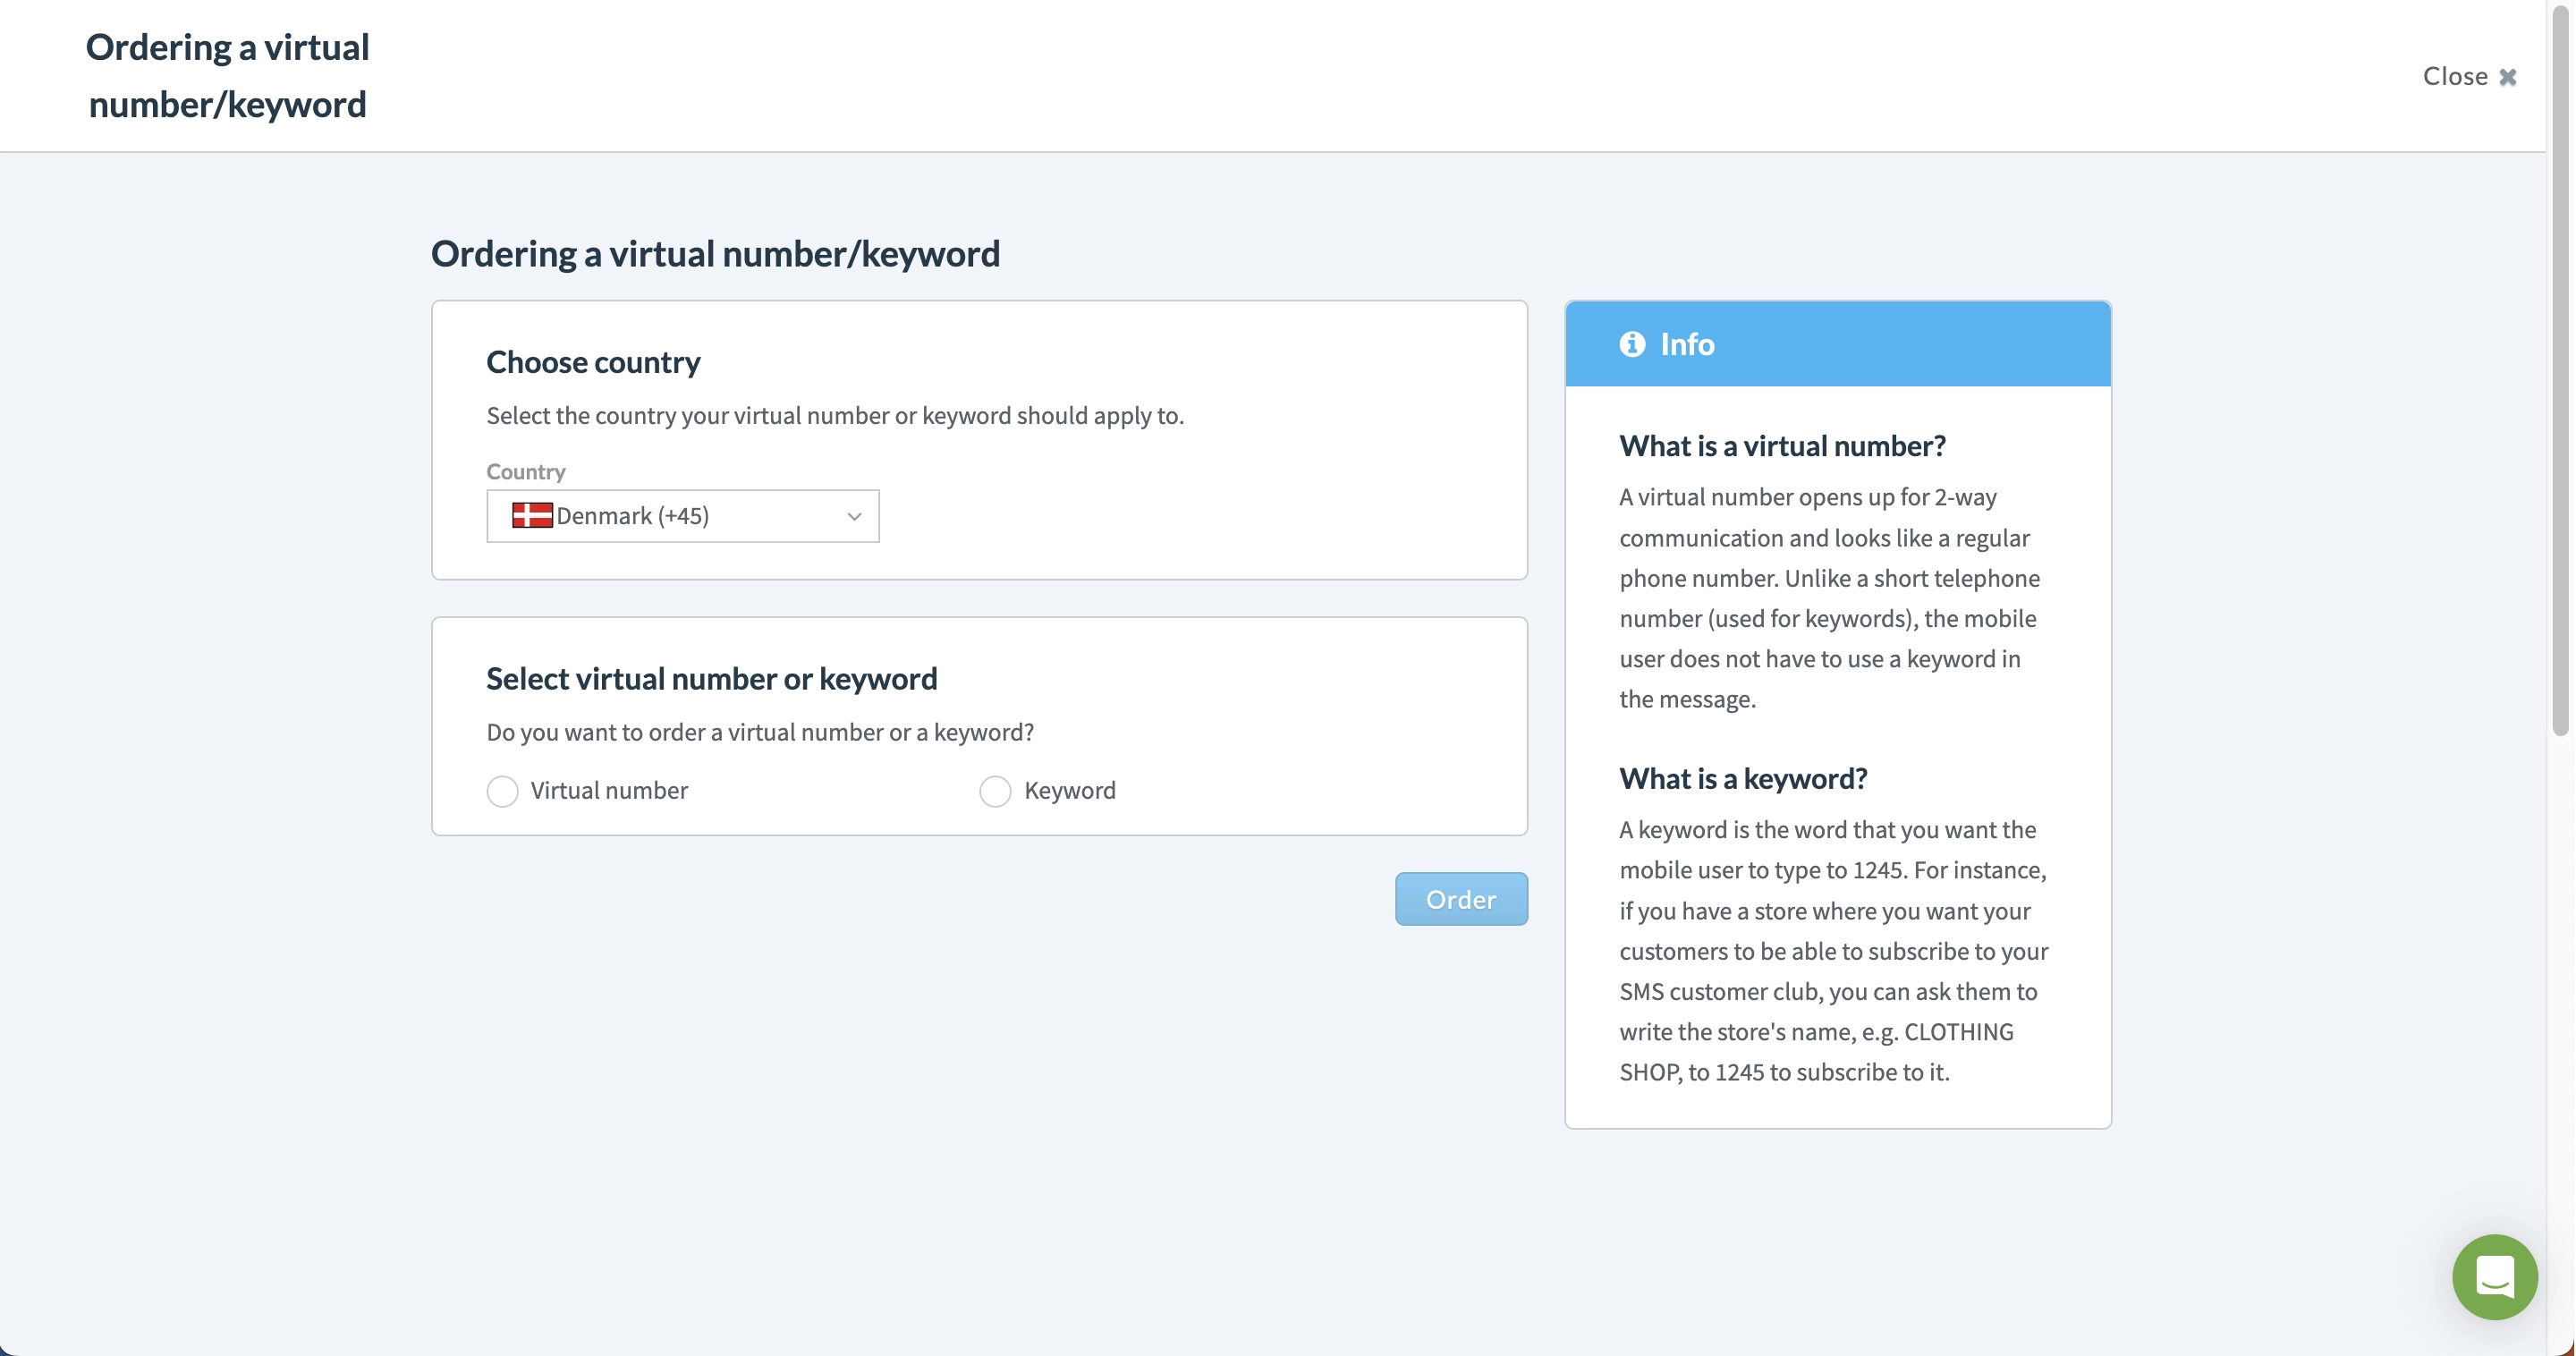
2 - Order a virtual number.
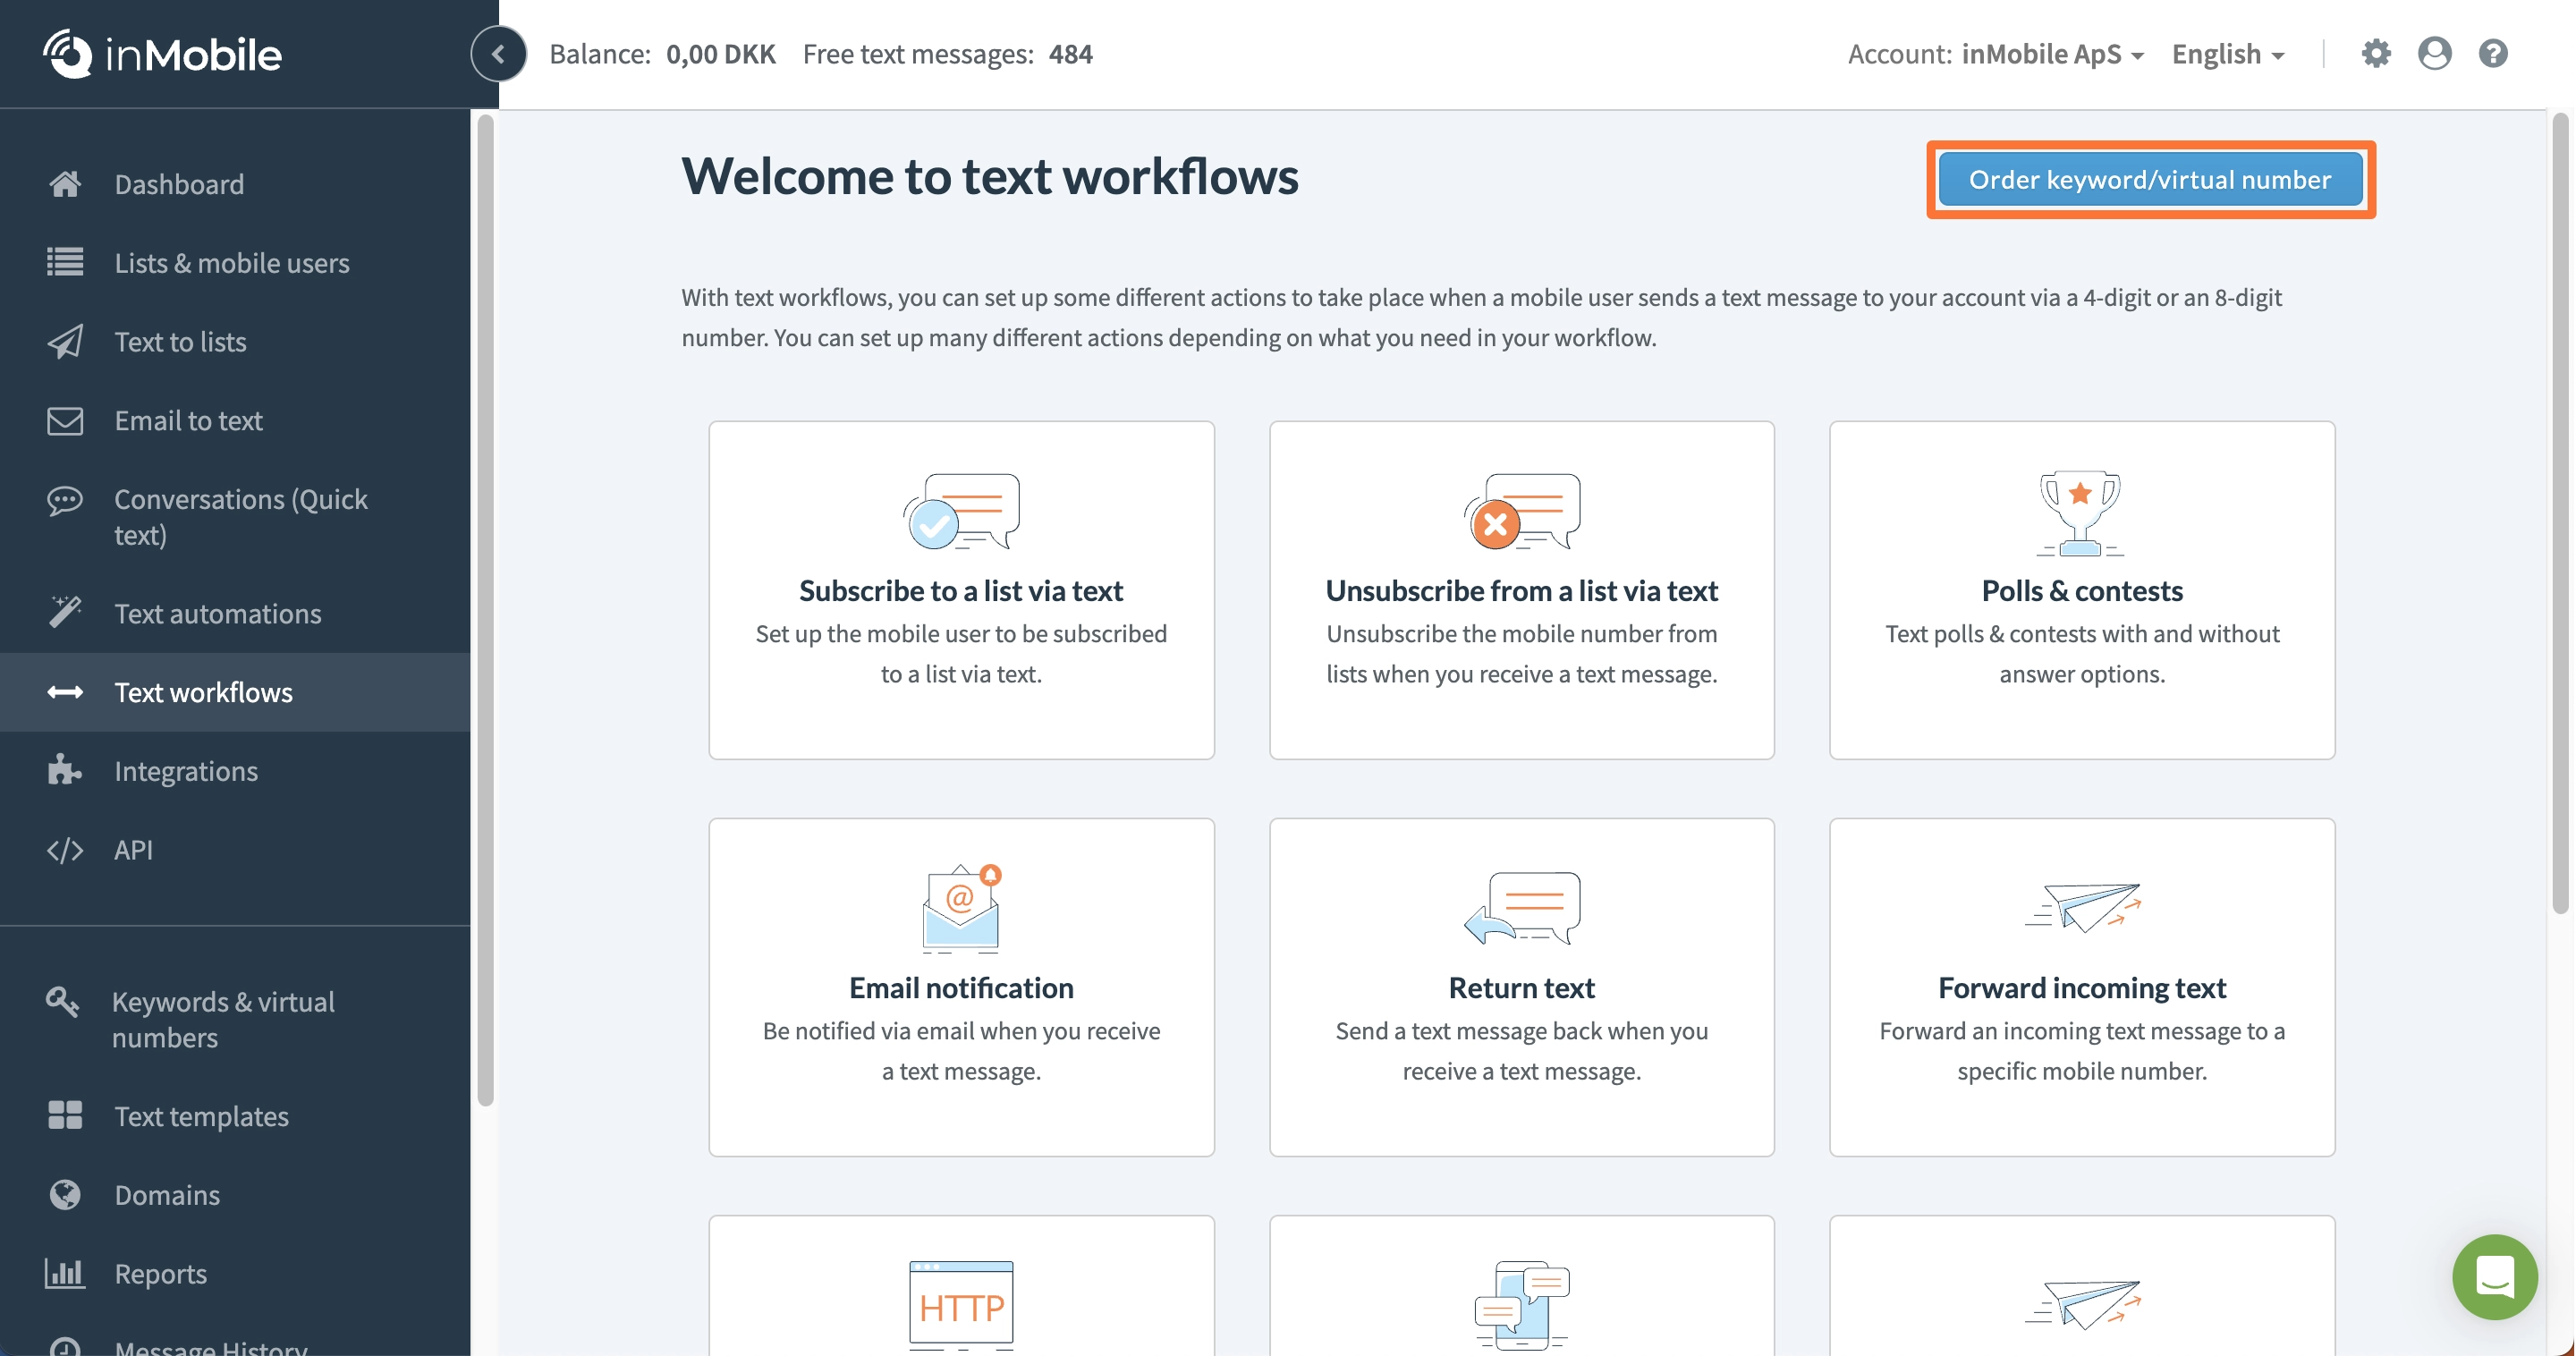
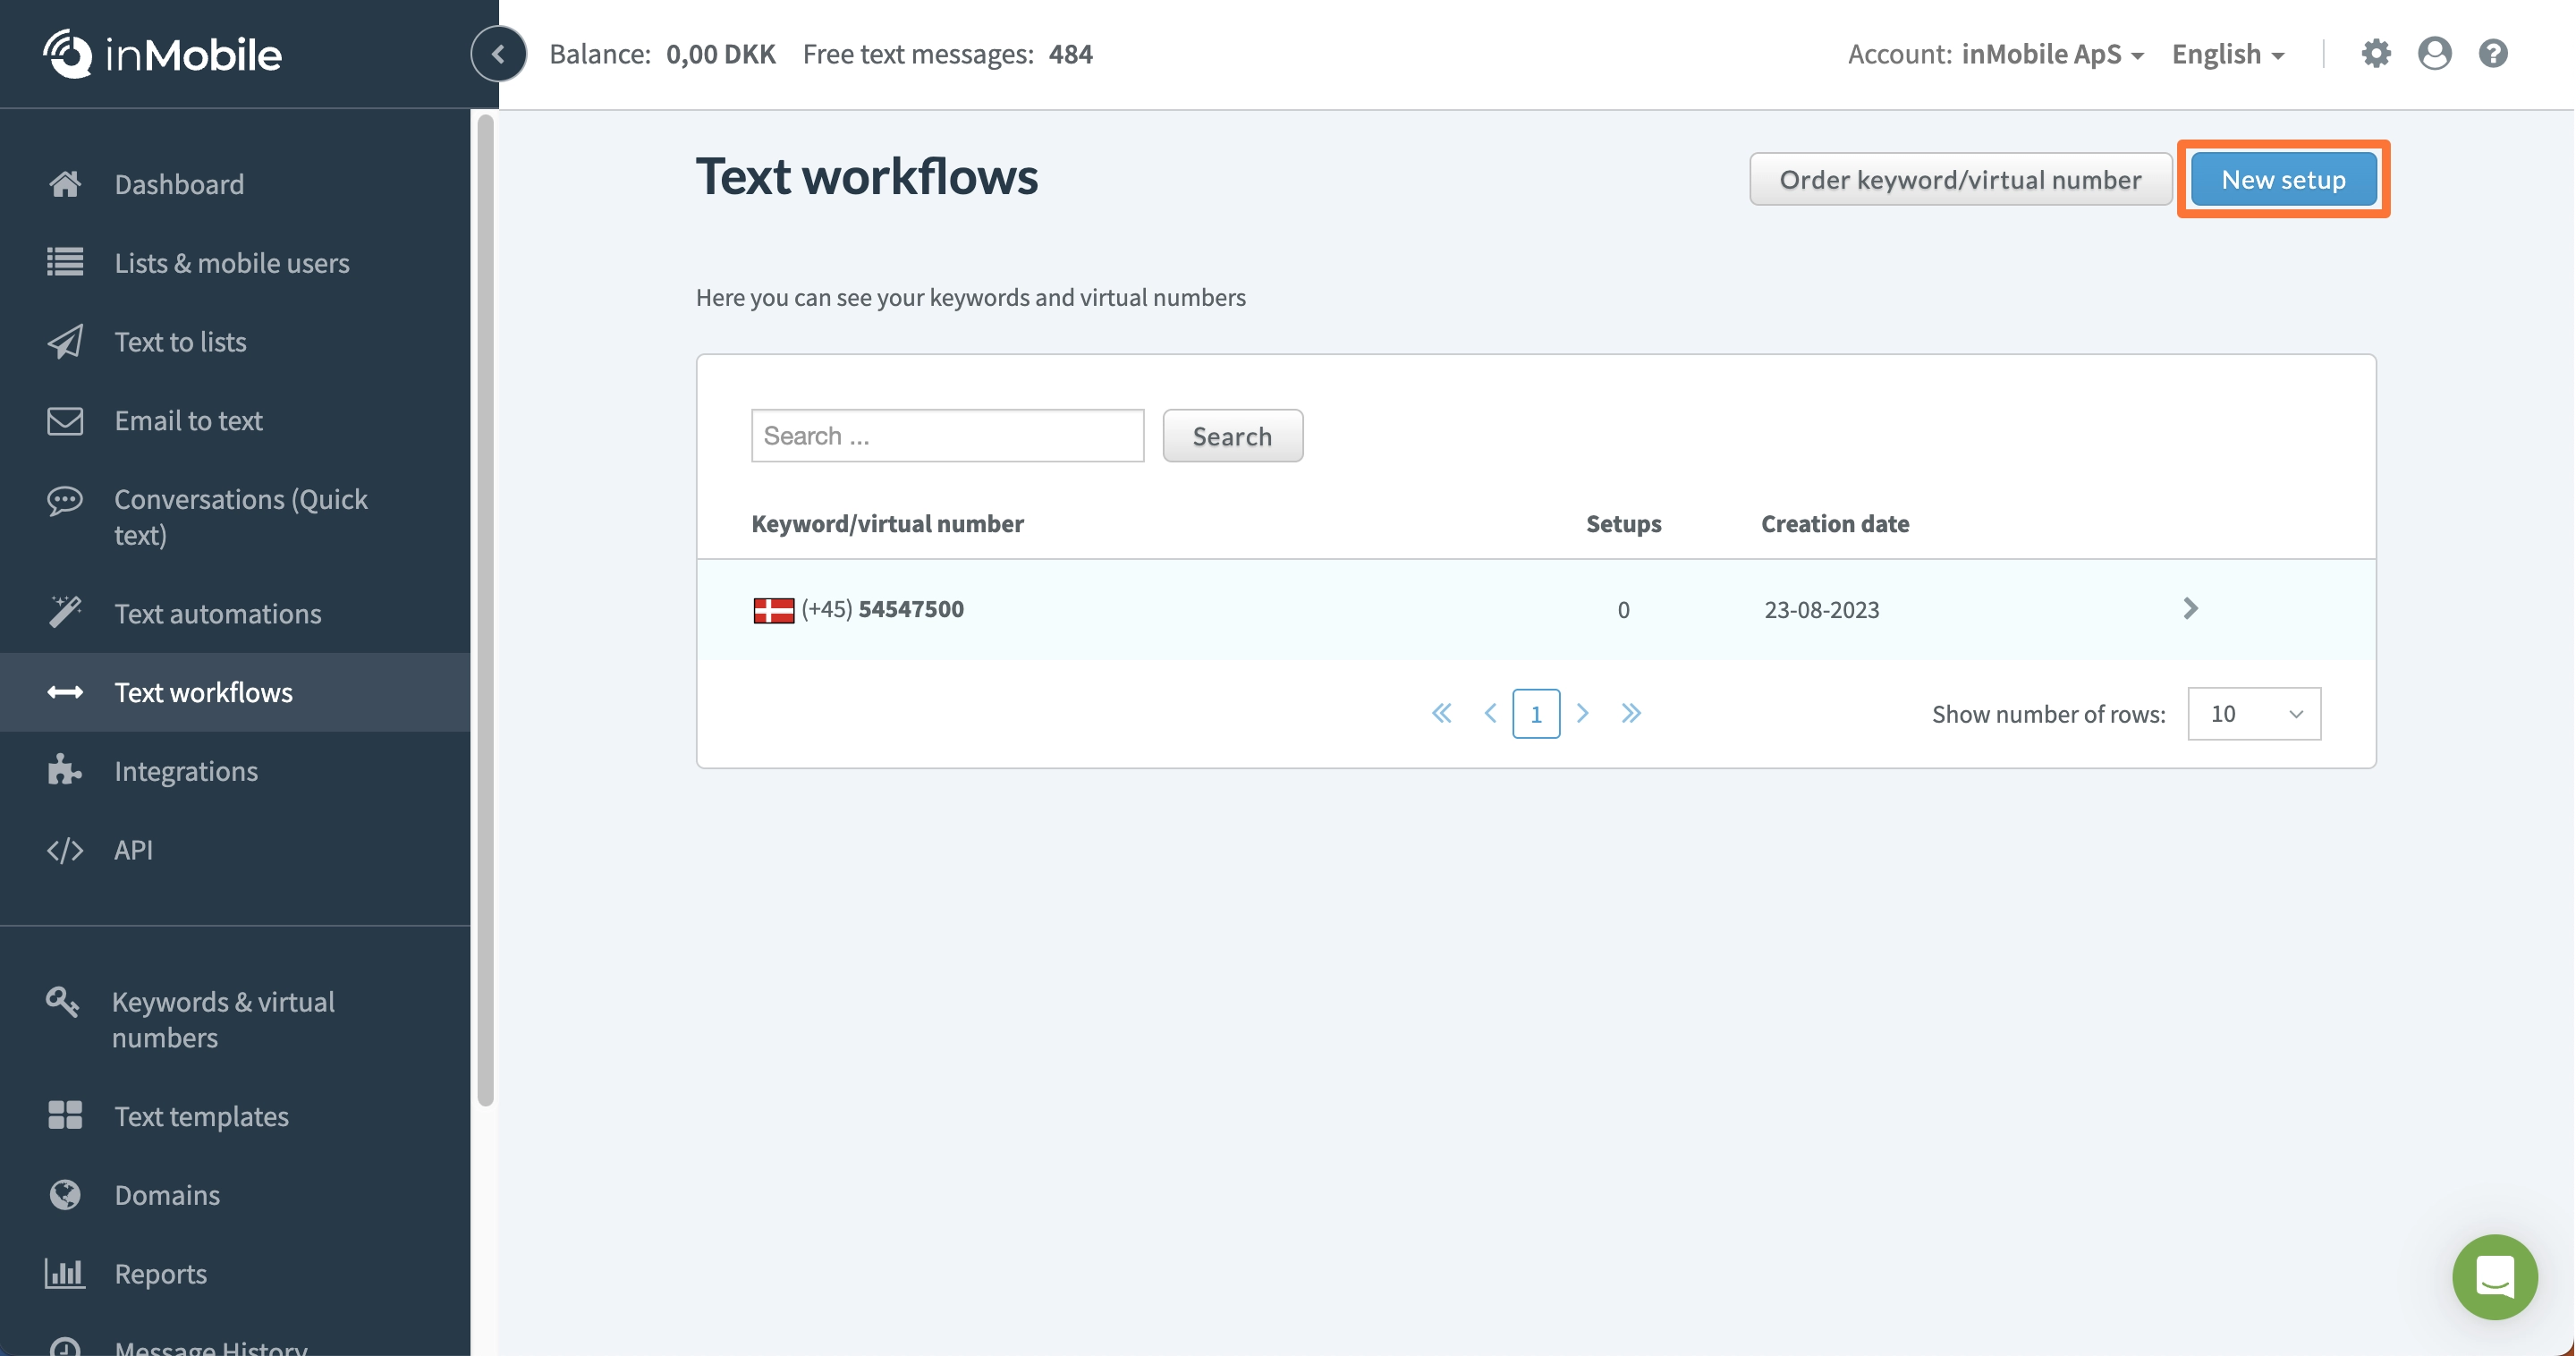
3 - Click on "New setup".
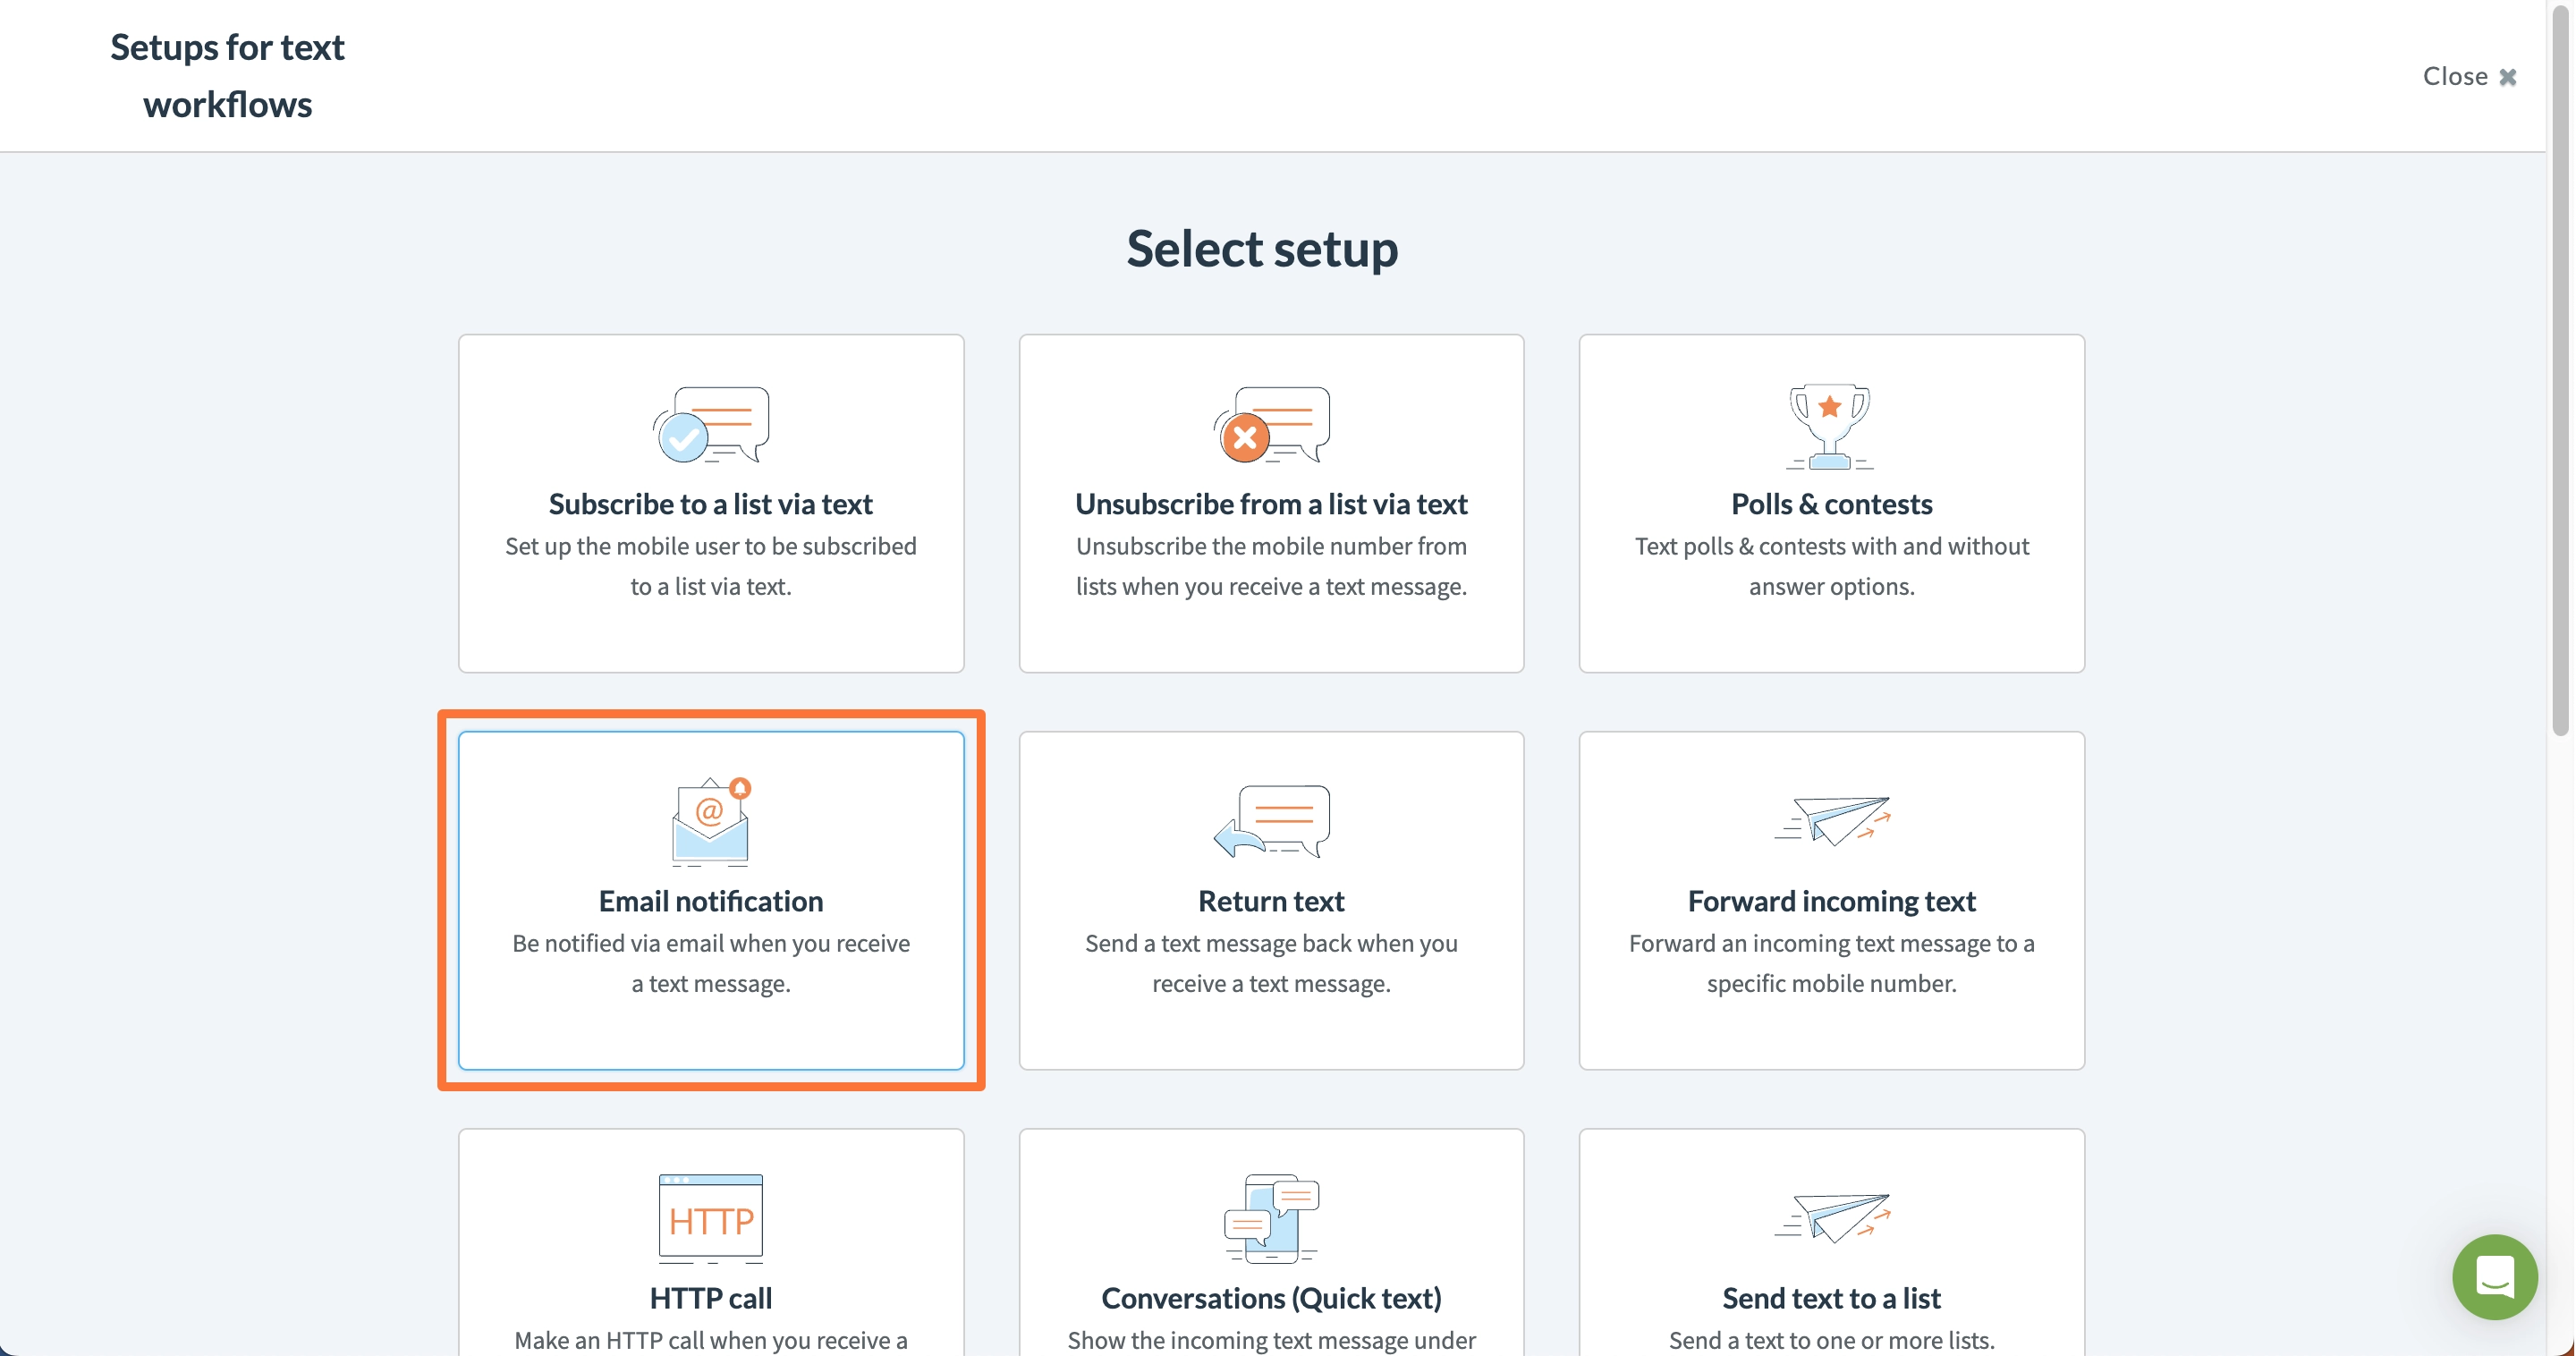
4 - Click on "Email notification"
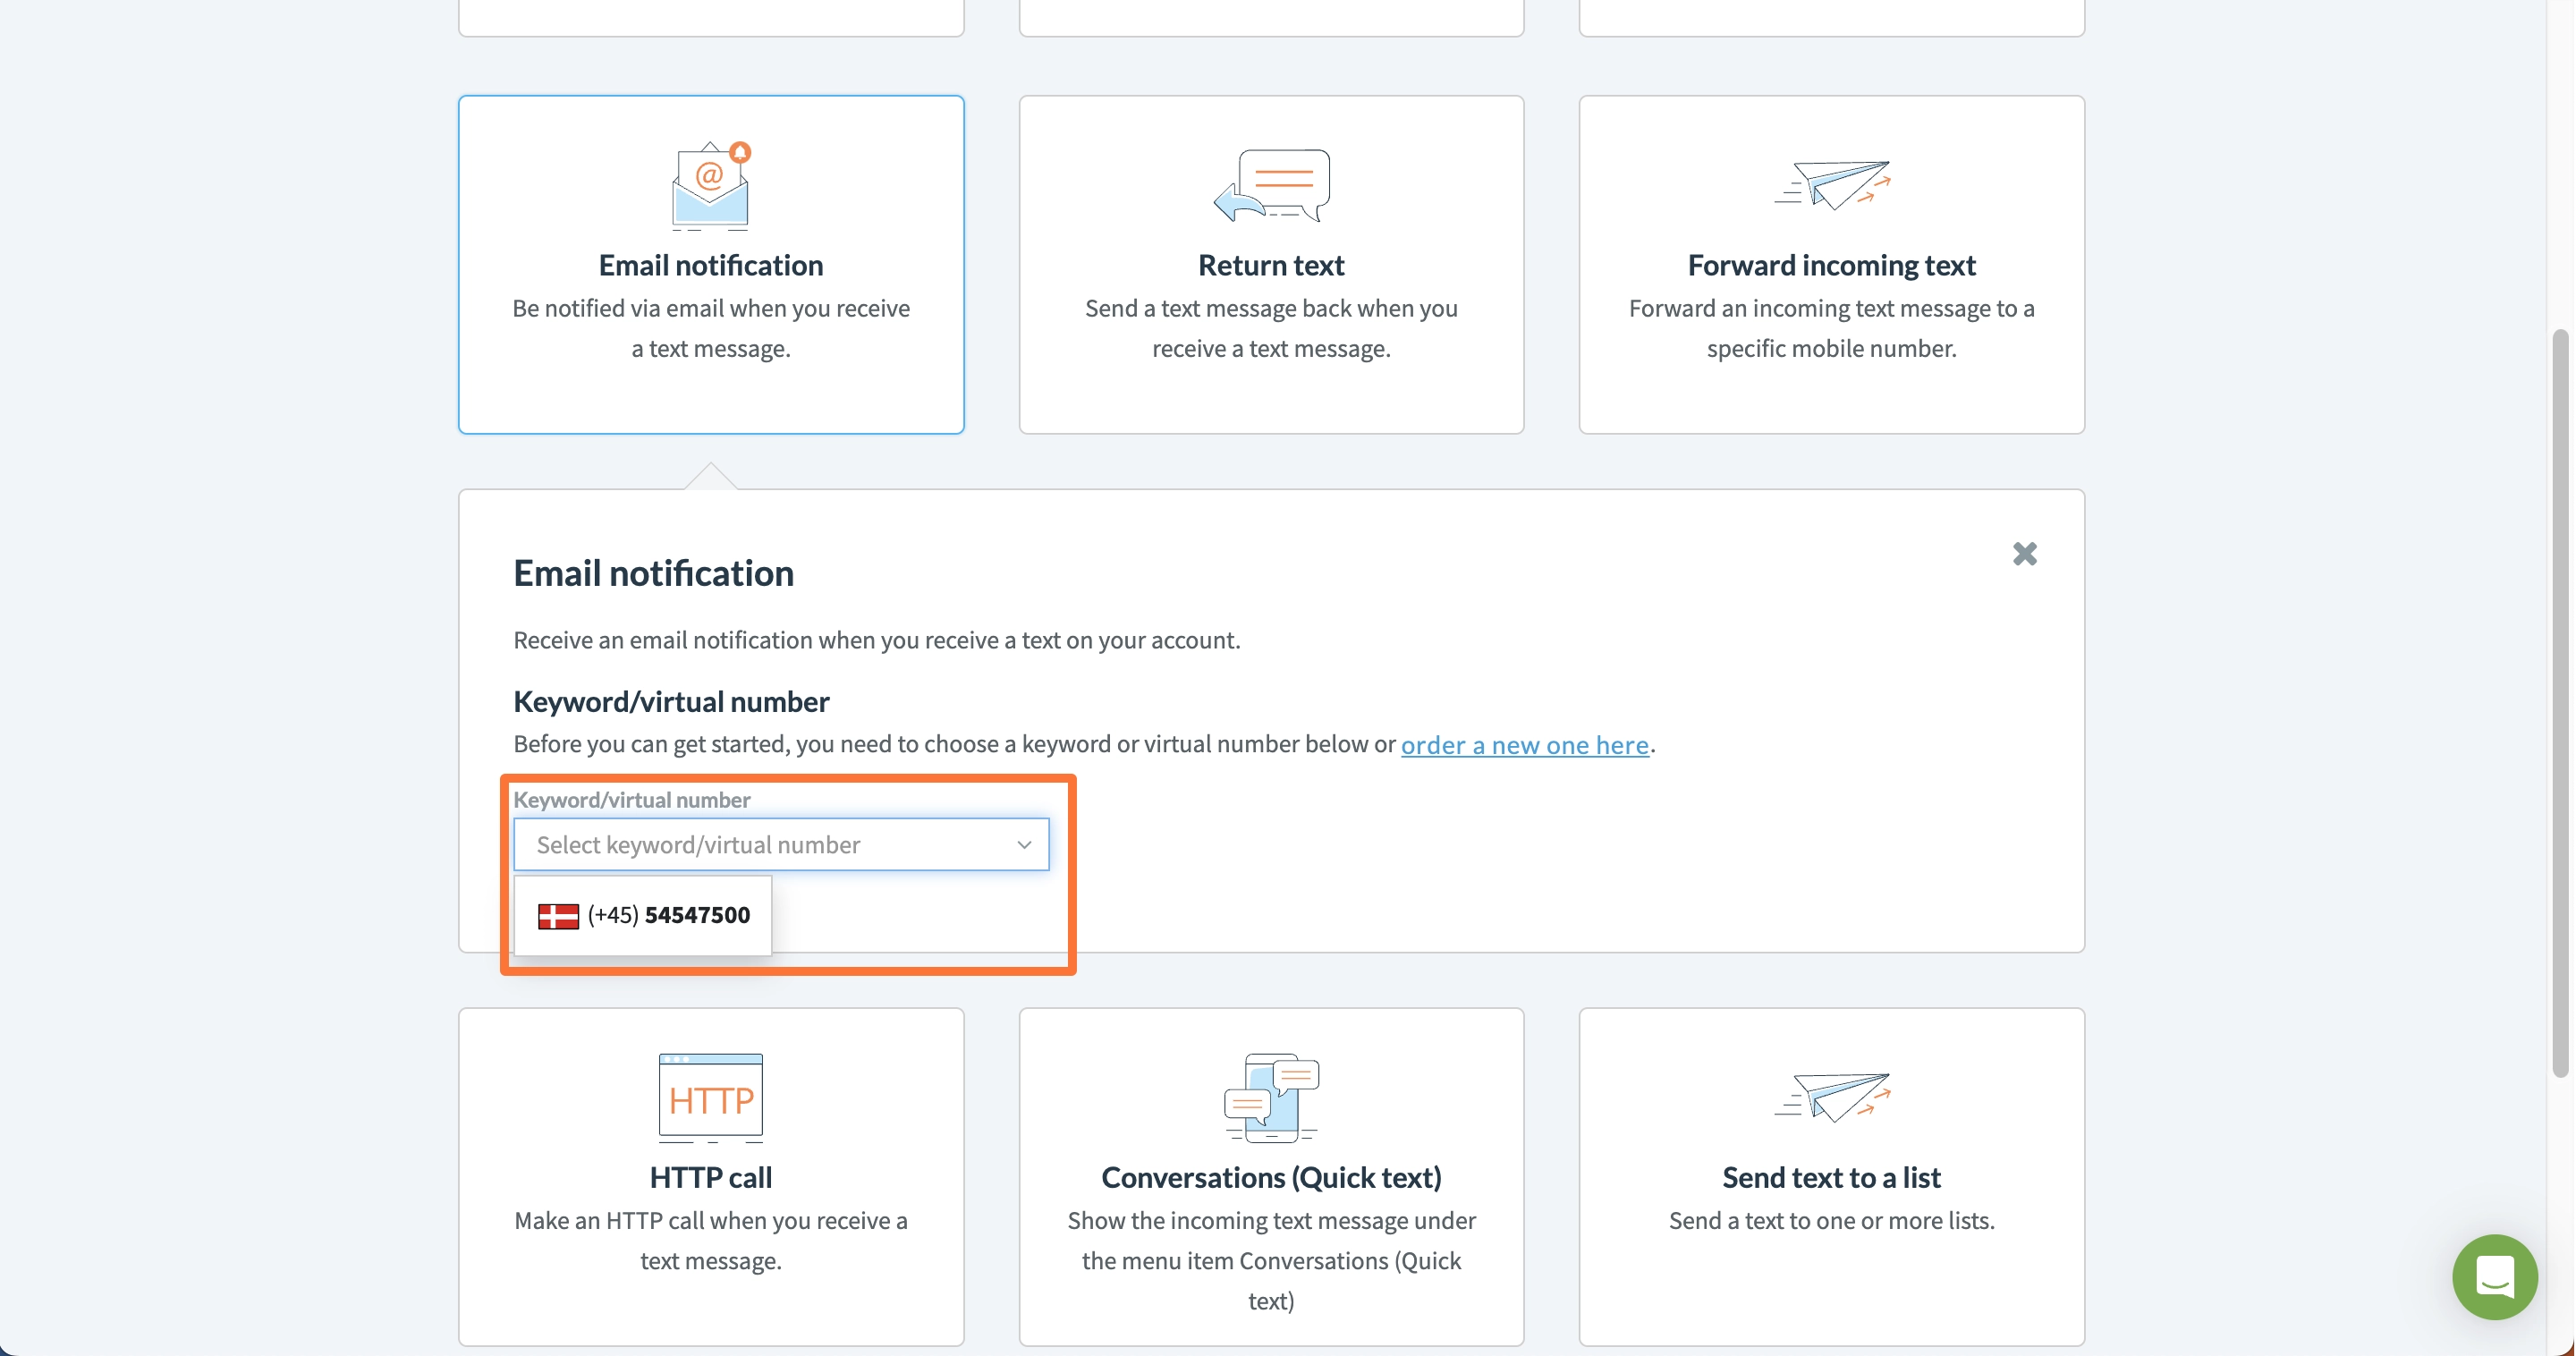
5 - Select the virtual number and click "Choose".
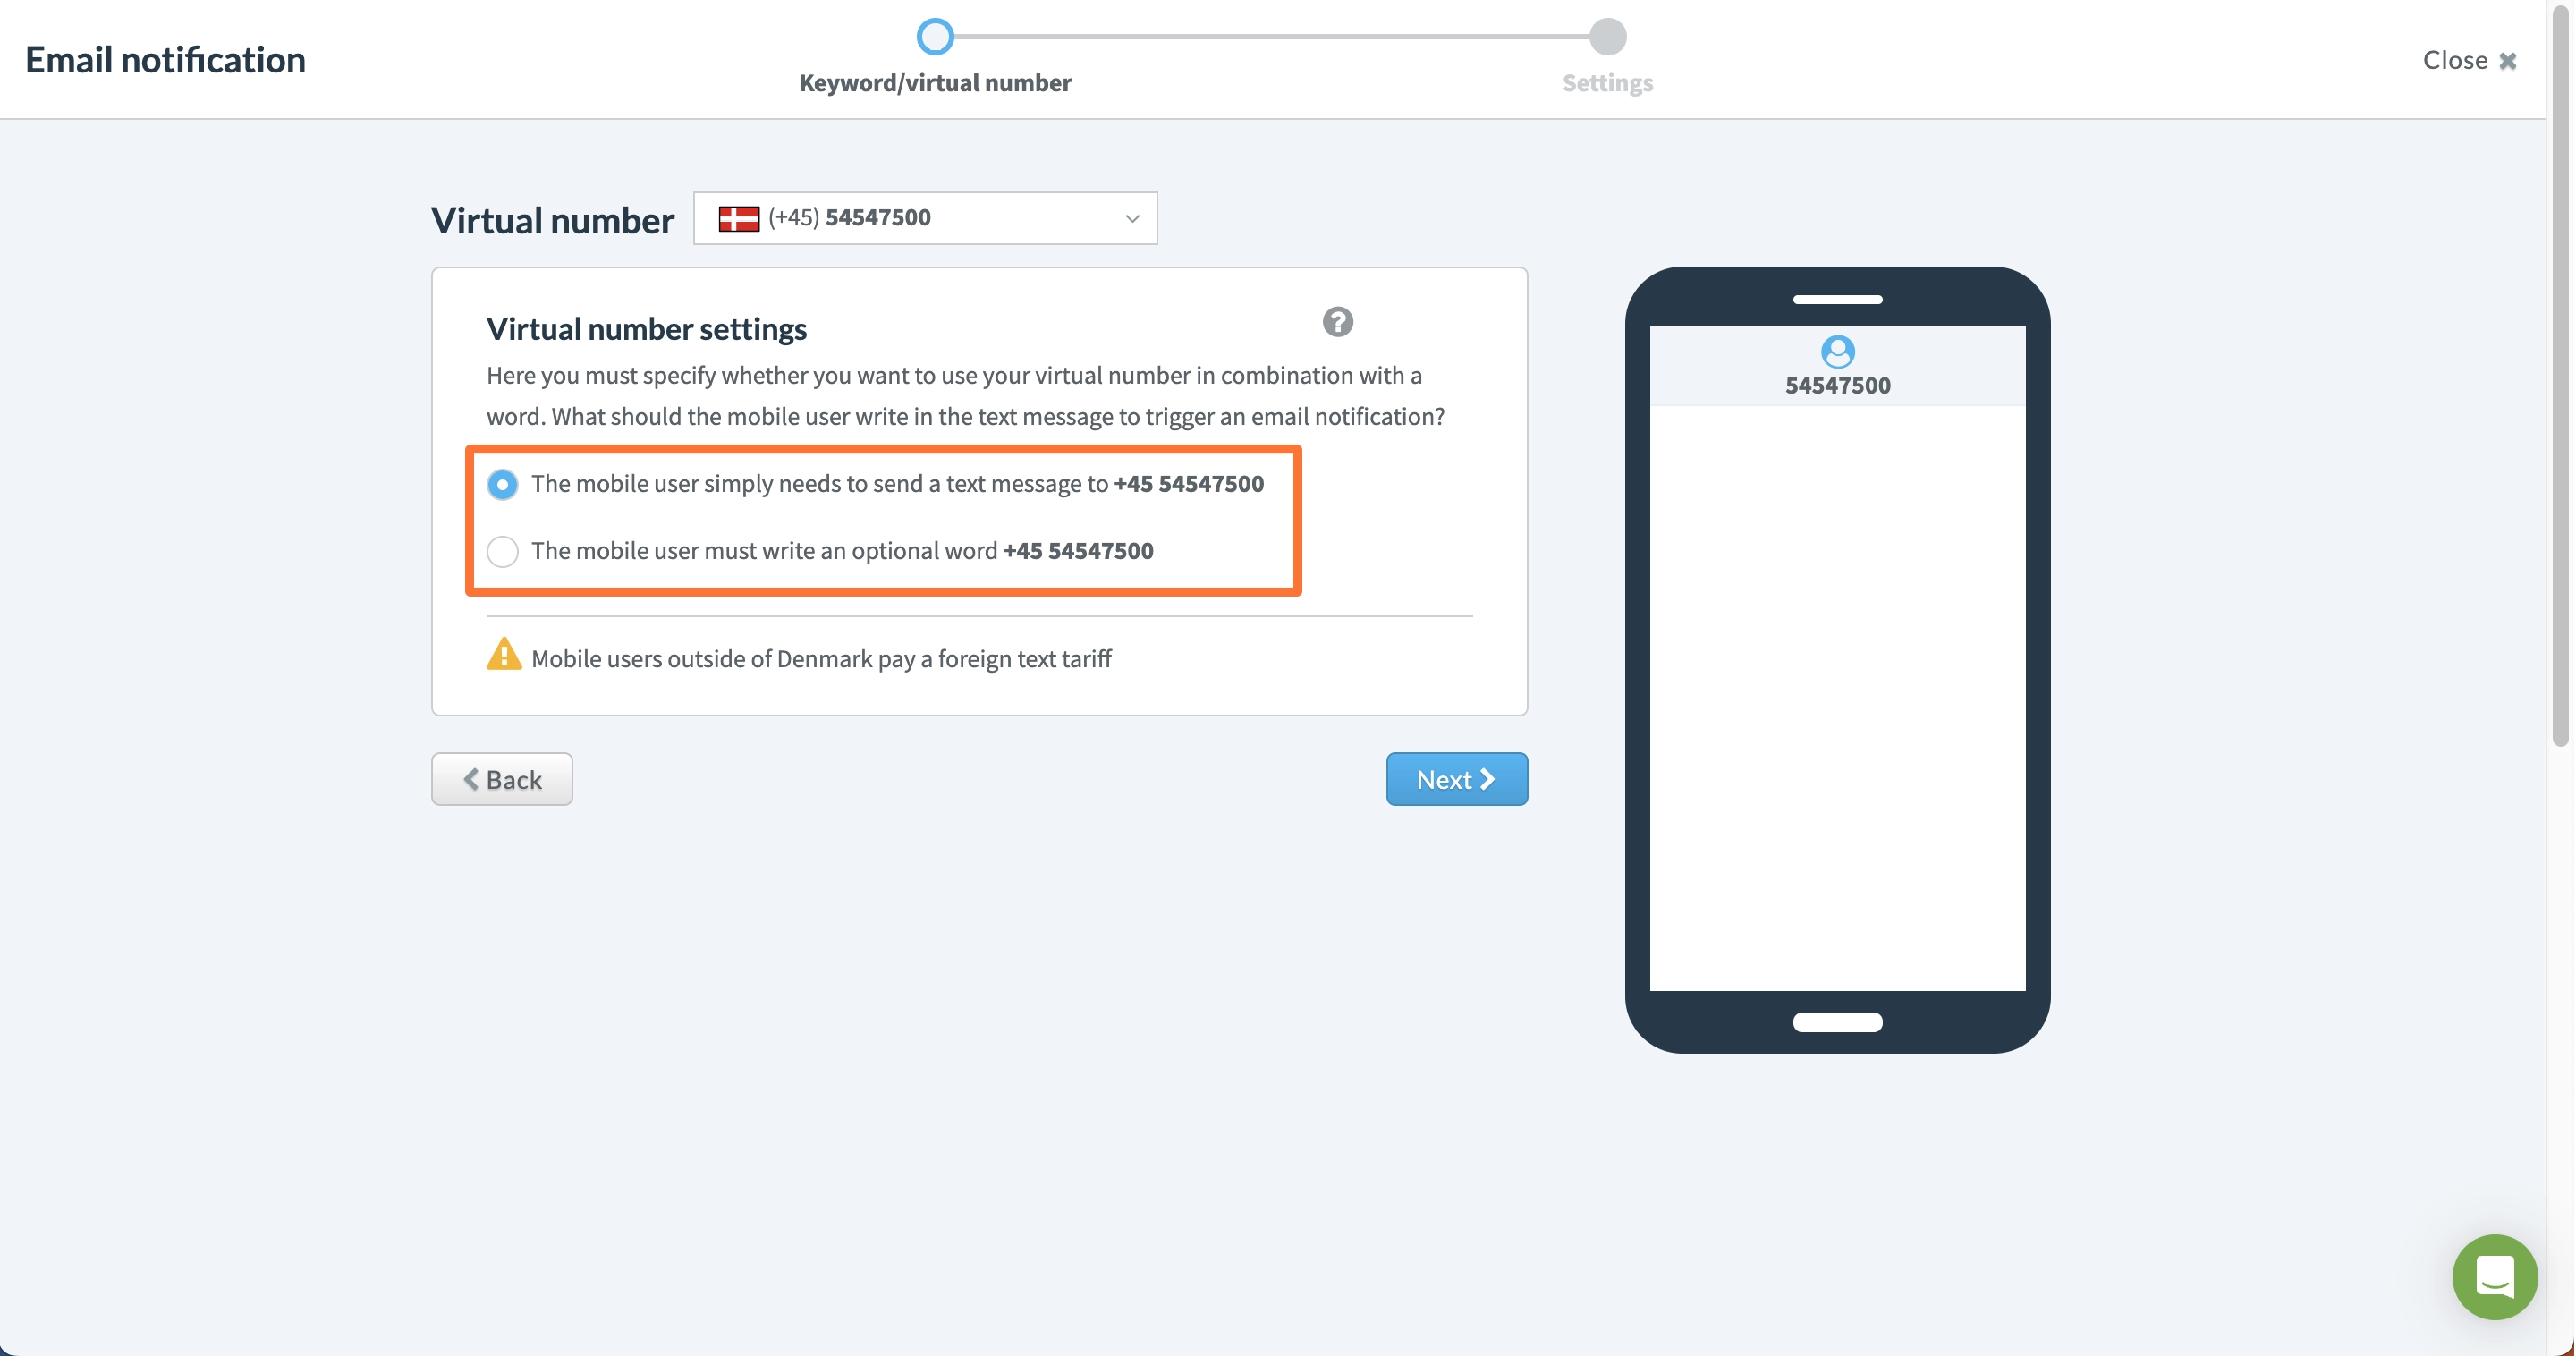
6 - Specify whether the sender should start the message with a specific word.
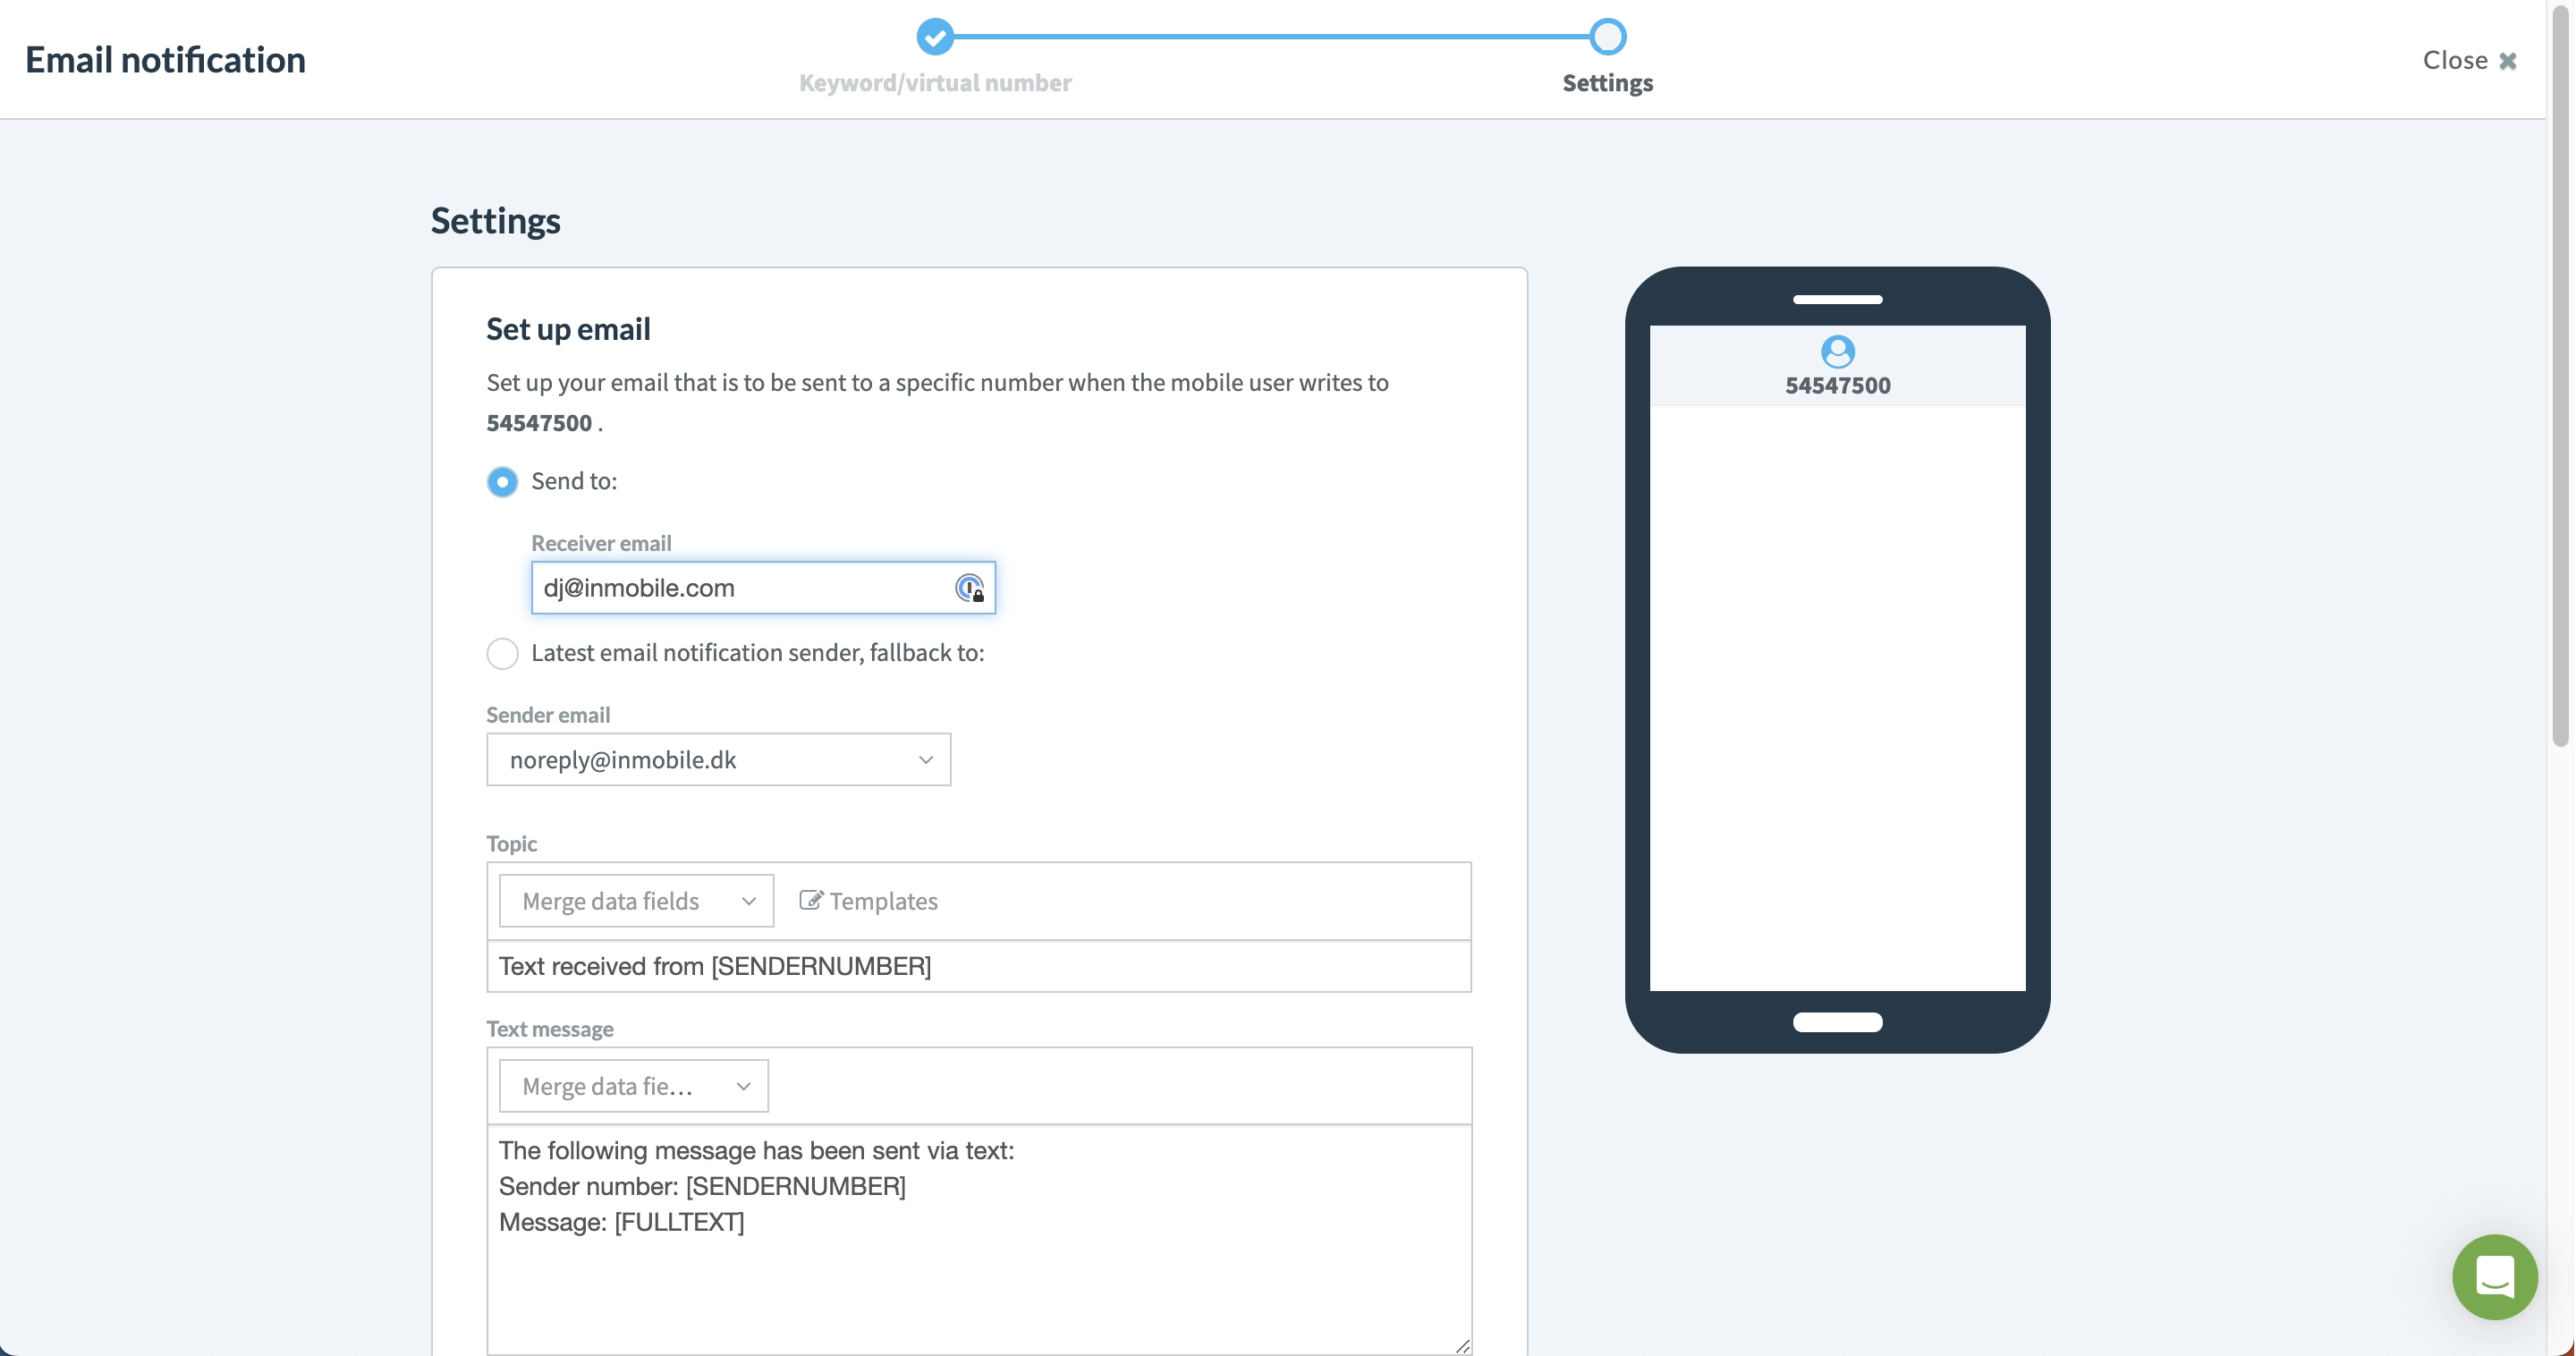
7 - Enter the email address where you want to receive notifications, specify the text for the subject field and email, and click “Create email notification”.